How to strap a bunch more shit to your bicycle
The Noob's Guide to Bikepacking - Part 2
Several times over the course of this project, I’ve had a bad feeling about what I had taken on. This peaked somewhere around hour three of my first fully loaded ride, when I realized that I had only gone about 15 km of the 60 that I had planned for that day. Similar feelings appeared shortly before the first article went live. What was I doing? Who did I think I was? How had I gone so wrong?
I feel similarly bad on the eve of this second article going live. This whole thing has gotten a little bit out of control. What started as a fun plan to push my boundaries a little bit has turned into a an orgy of gear acquisition, and I feel a bit like that annoying rich kid down the block that shows up on the first day with the best gear and no clue how to use it. For that, I’m sorry.
However, despite all that, I’m pretty excited with how the first article went. I enjoyed reading the comments and I appreciate that people seemed to approach it with a sense of openness and collaboration. Honestly, I’m not suggesting that you go out and buy all of this stuff. Hopefully me trying it out will give you an idea of what you should prioritize yourself?
Last time around we talked a bit about the two bags you’ll probably want to prioritize to get started with hauling a bunch of shit around on your bicycle. A good backpack and some sort of bag on the front of your bike is probably all that you need for your first experience. I also introduced you to my ever expanding list of lessons that I’ve learned along the way. I’m going to arbitrarily add things to this list as I remember them:
1 – Start really small.
2 - Bring way less shit than you think you need.
3 – Carry a lot of water.
4 – There is no “perfect” set-up. They’re all just trade-offs that make certain things less bad.
5 – Shit can go very wrong, very easily, and seems to at least once each ride. When it does, take a moment, think, then act.
6 – Do not rely on Trailforks for navigation.
7 – Test, and then test again.
New to the list, we have these two gems of wisdom.
8 – Wear comfortable shoes – both for riding and for walking.
9 – Wear touchscreen compatible gloves (especially if you’re going to ignore lesson #6).
For part 2, we’re going to stick with the topic of how to strap things to your bicycle, but will start talking about some of the bags you may need to consider for longer trips, or if you are just interested in pulling a bit more of the weight out of your backpack. In rough order of importance, here are some of the ways you should consider doing so.
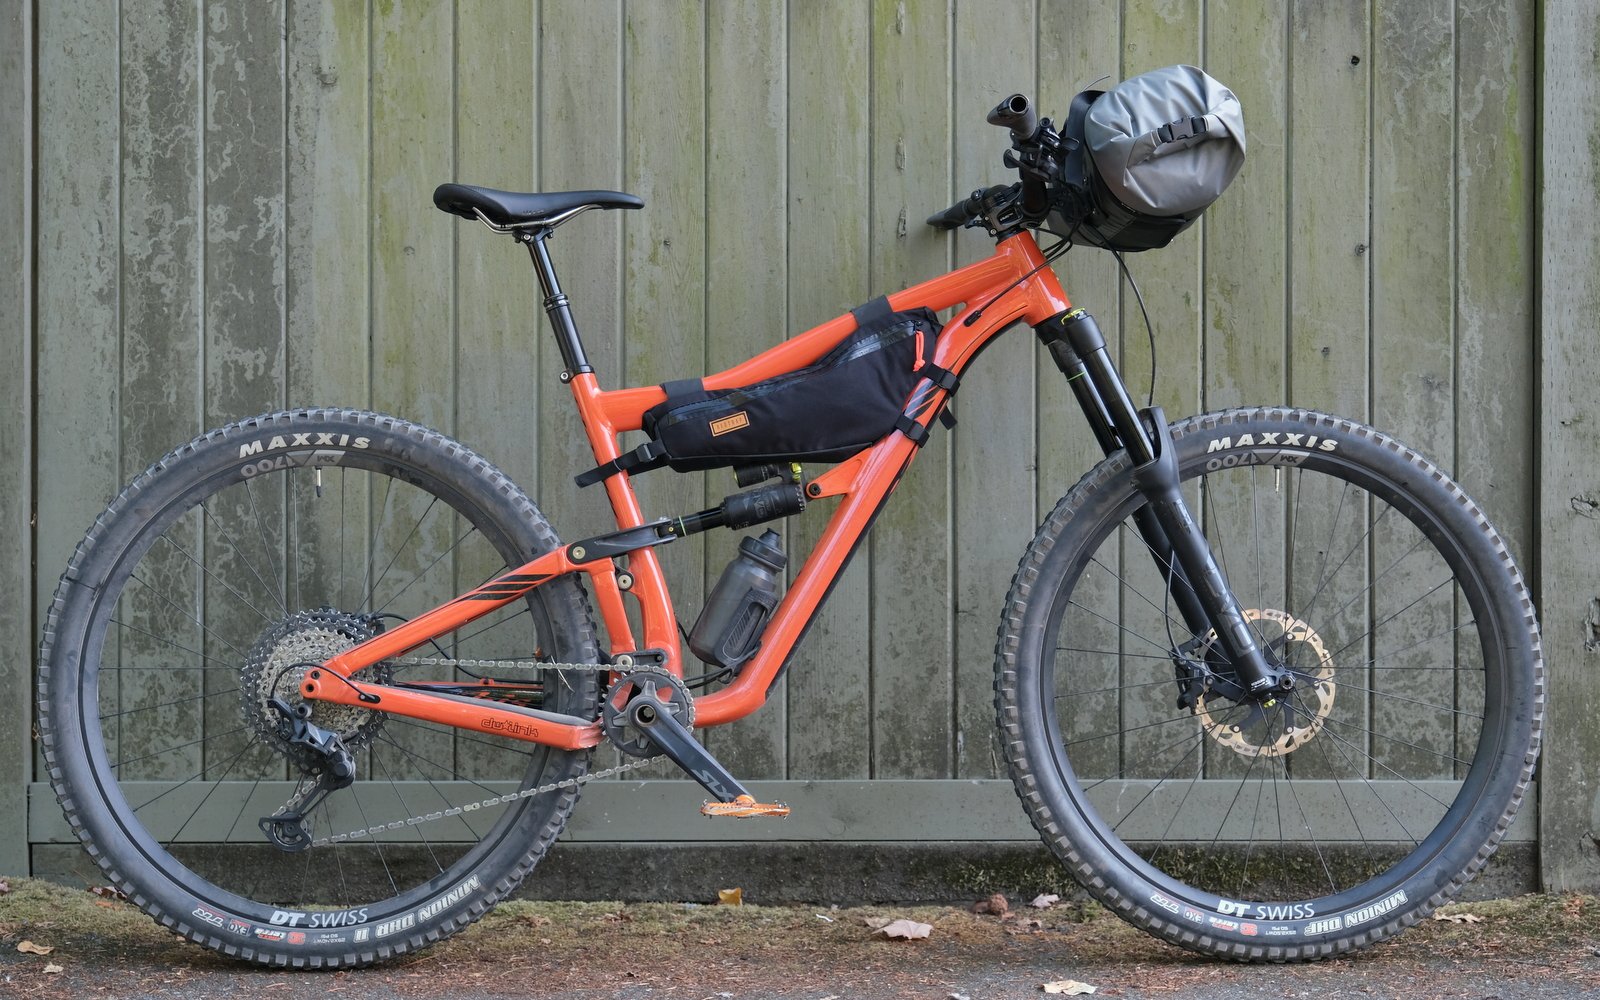
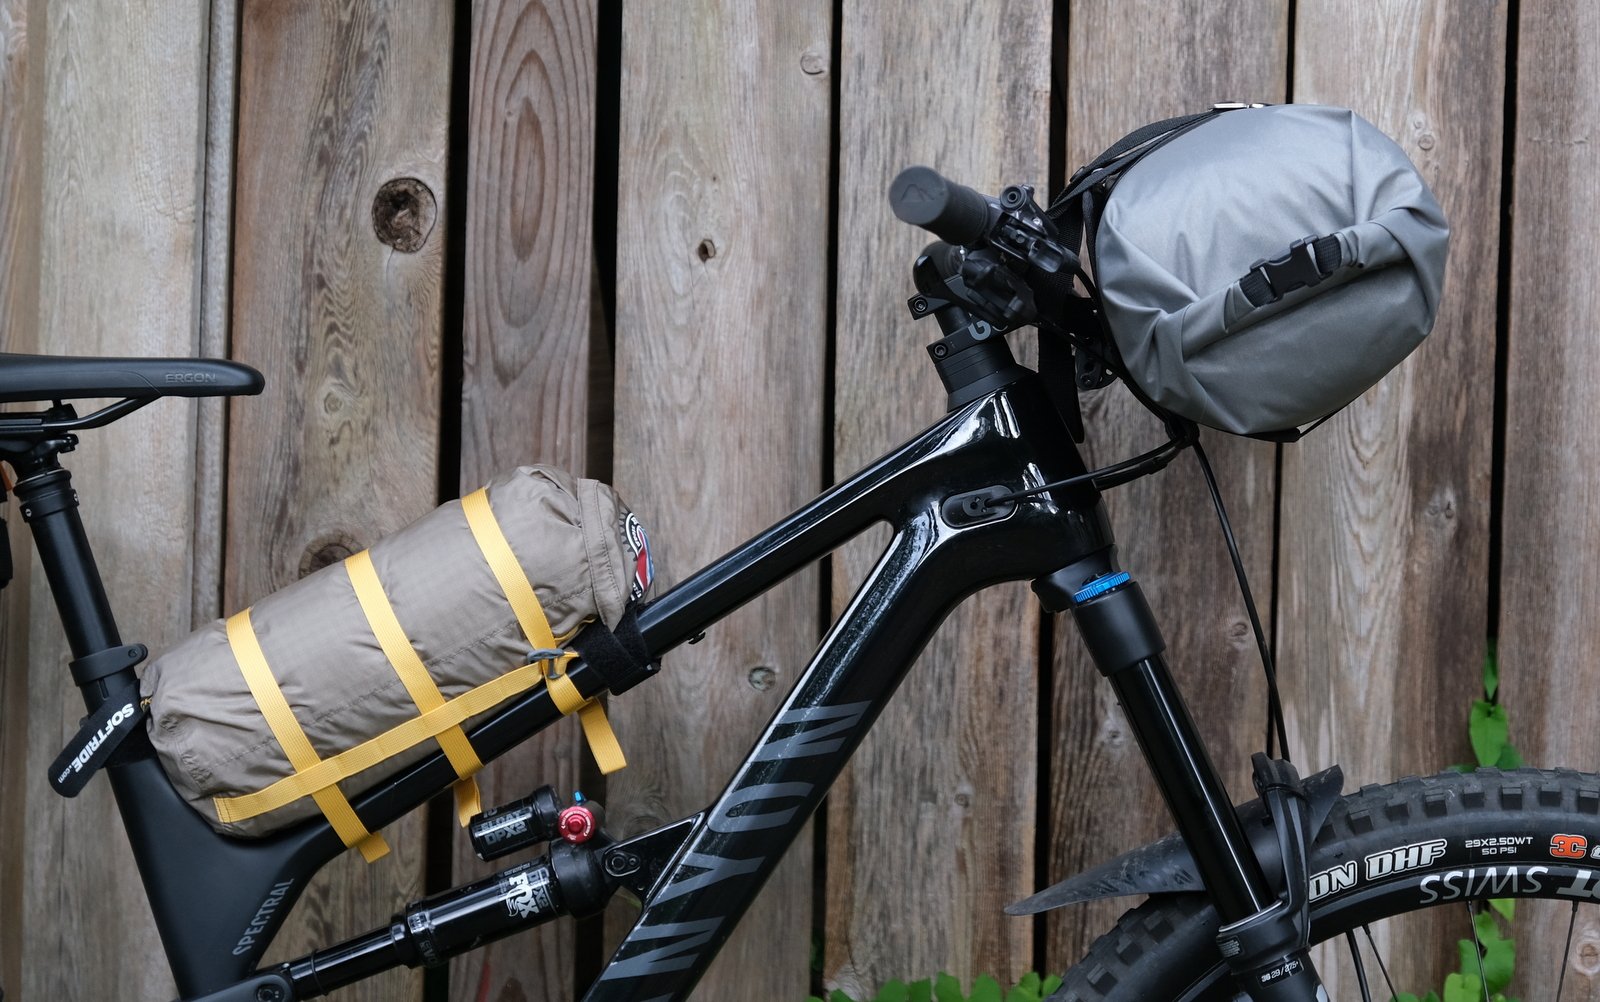
That certainly is a bicycle with some stuff strapped to it.
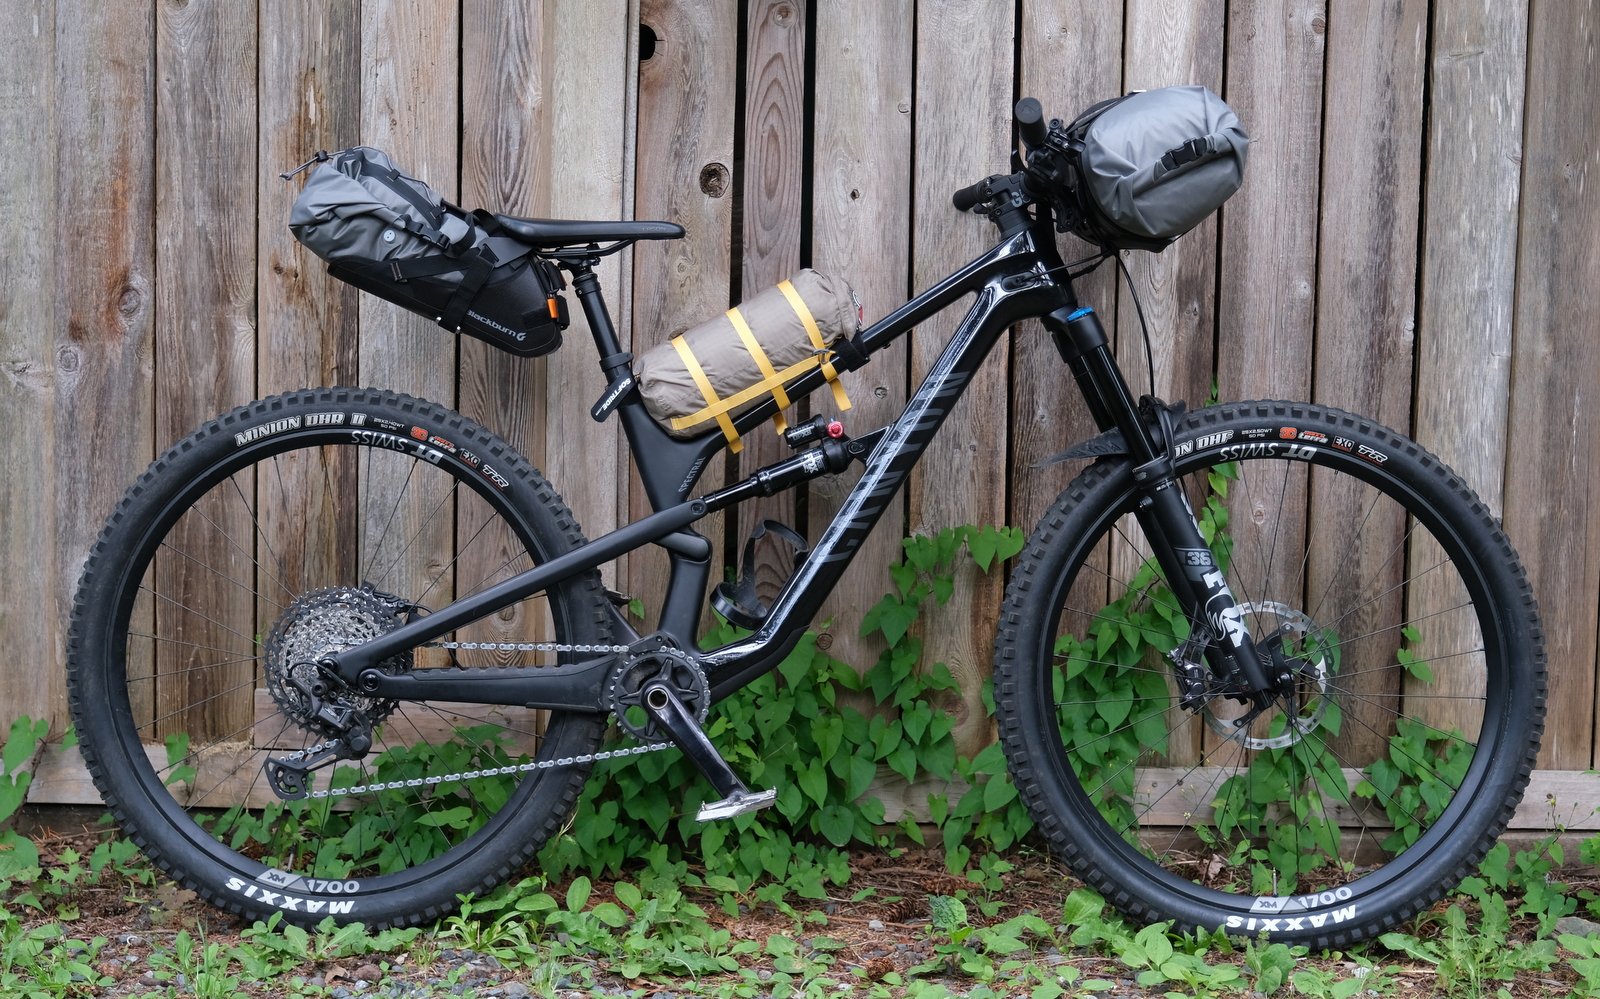
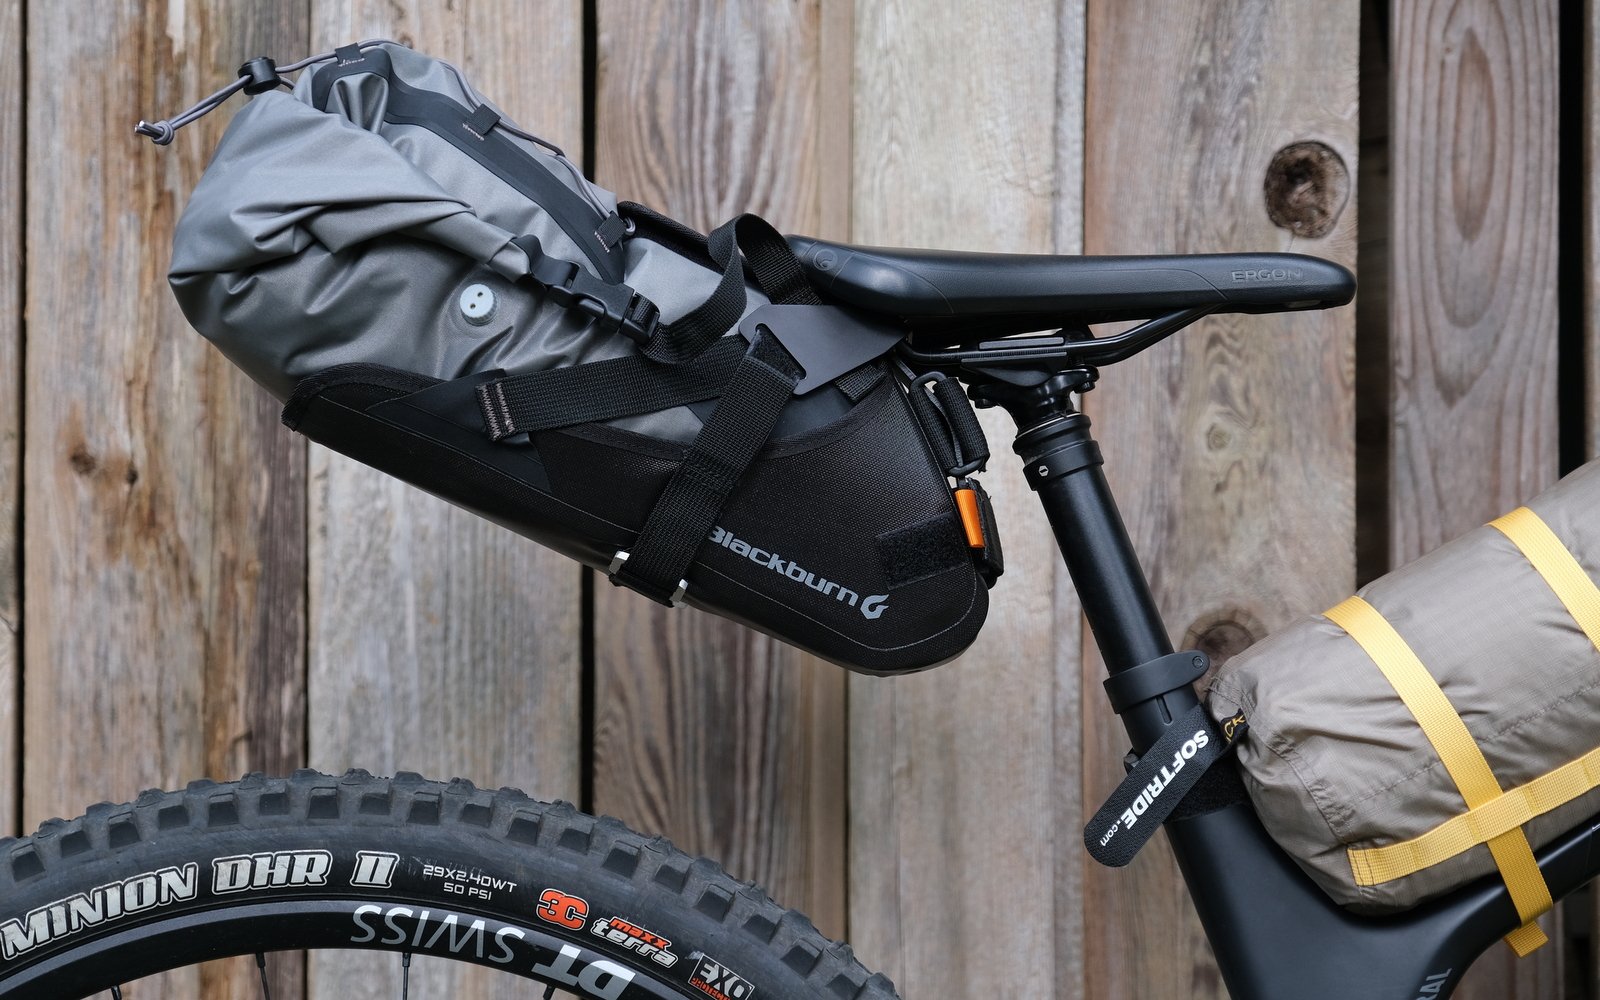
And that's a different bicycle, with even more stuff strapped to it, in a slightly different way.
Carrying Tools
Whole articles have been written about strategic ways to carry tools on your bicycle, so I’m not going to put energy into re-writing any of that. The one point I will make is that I have a fundamental disagreement with putting tools in a place where they’re subjected to the elements. The Specialized SWAT system seems amazing, as do the various head tube and bar end storage solutions. But I like to keep my tube, my pump and my bit ratchet set tucked nicely away in a bag someplace. AJ may not agree with me on that point, but his article is a great place to start if you’re considering hauling tools directly on your bicycle. My near term strategy is to find a frame bag that will allow me to carry at least some of my current tool selection, and I may explore some steerer tube/bar end solutions in the near future.
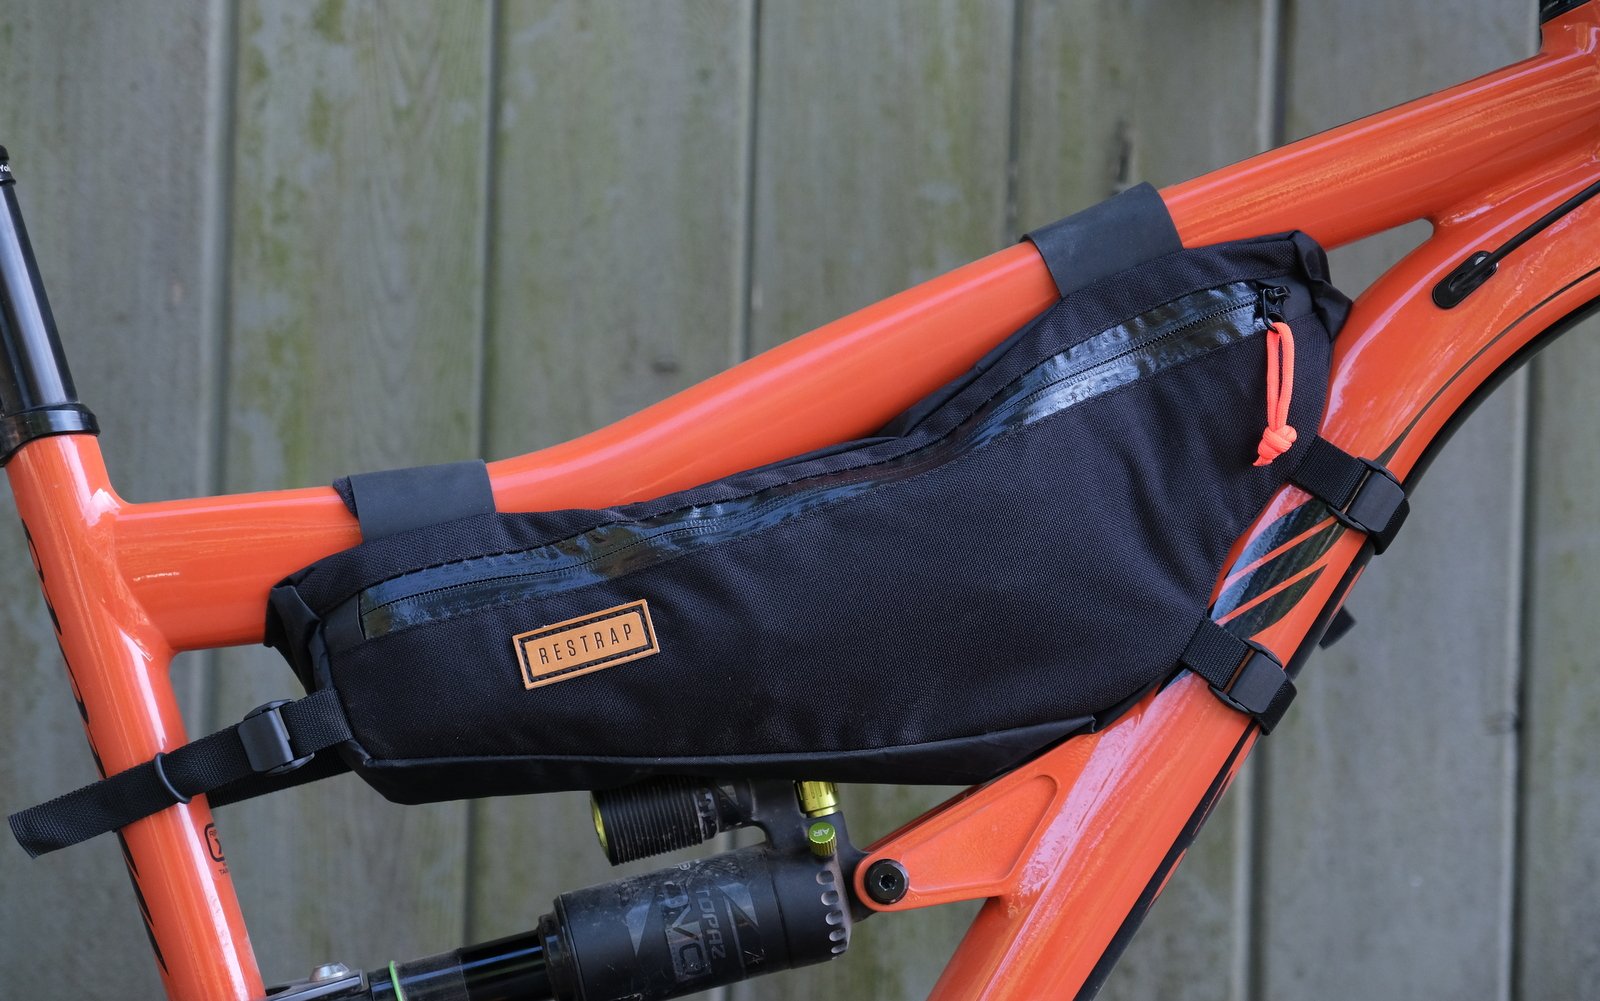
Fit on the Ibis isn't perfect, but it's not too bad
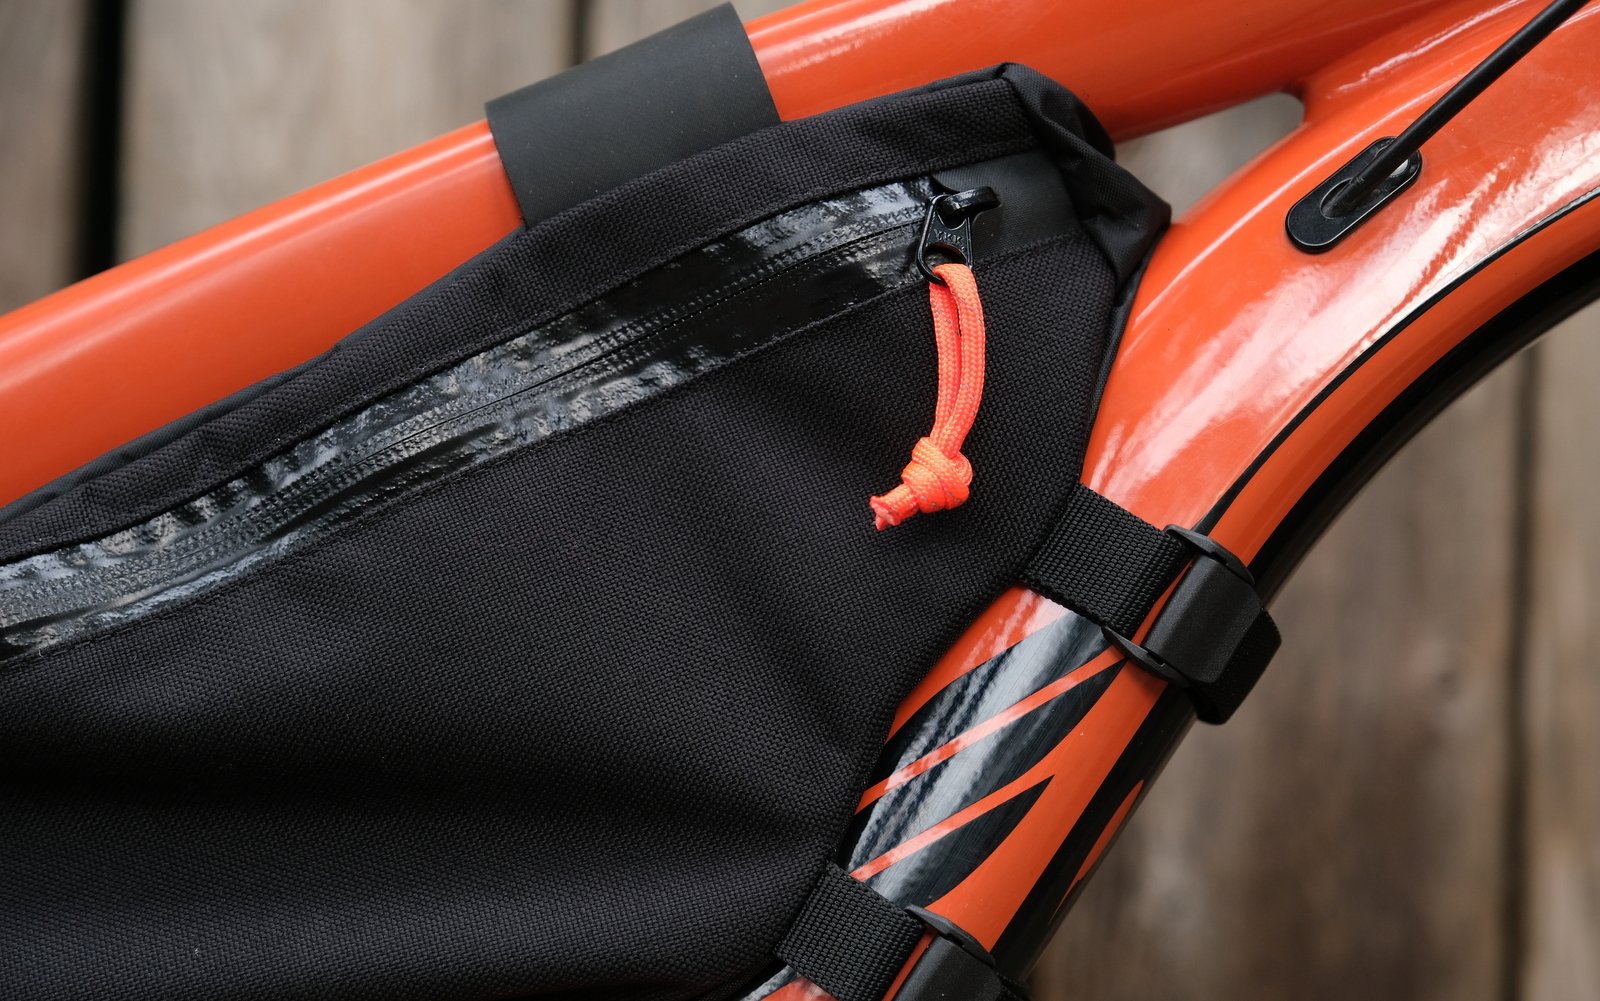
In total, there are 5 straps that keep things pretty tight
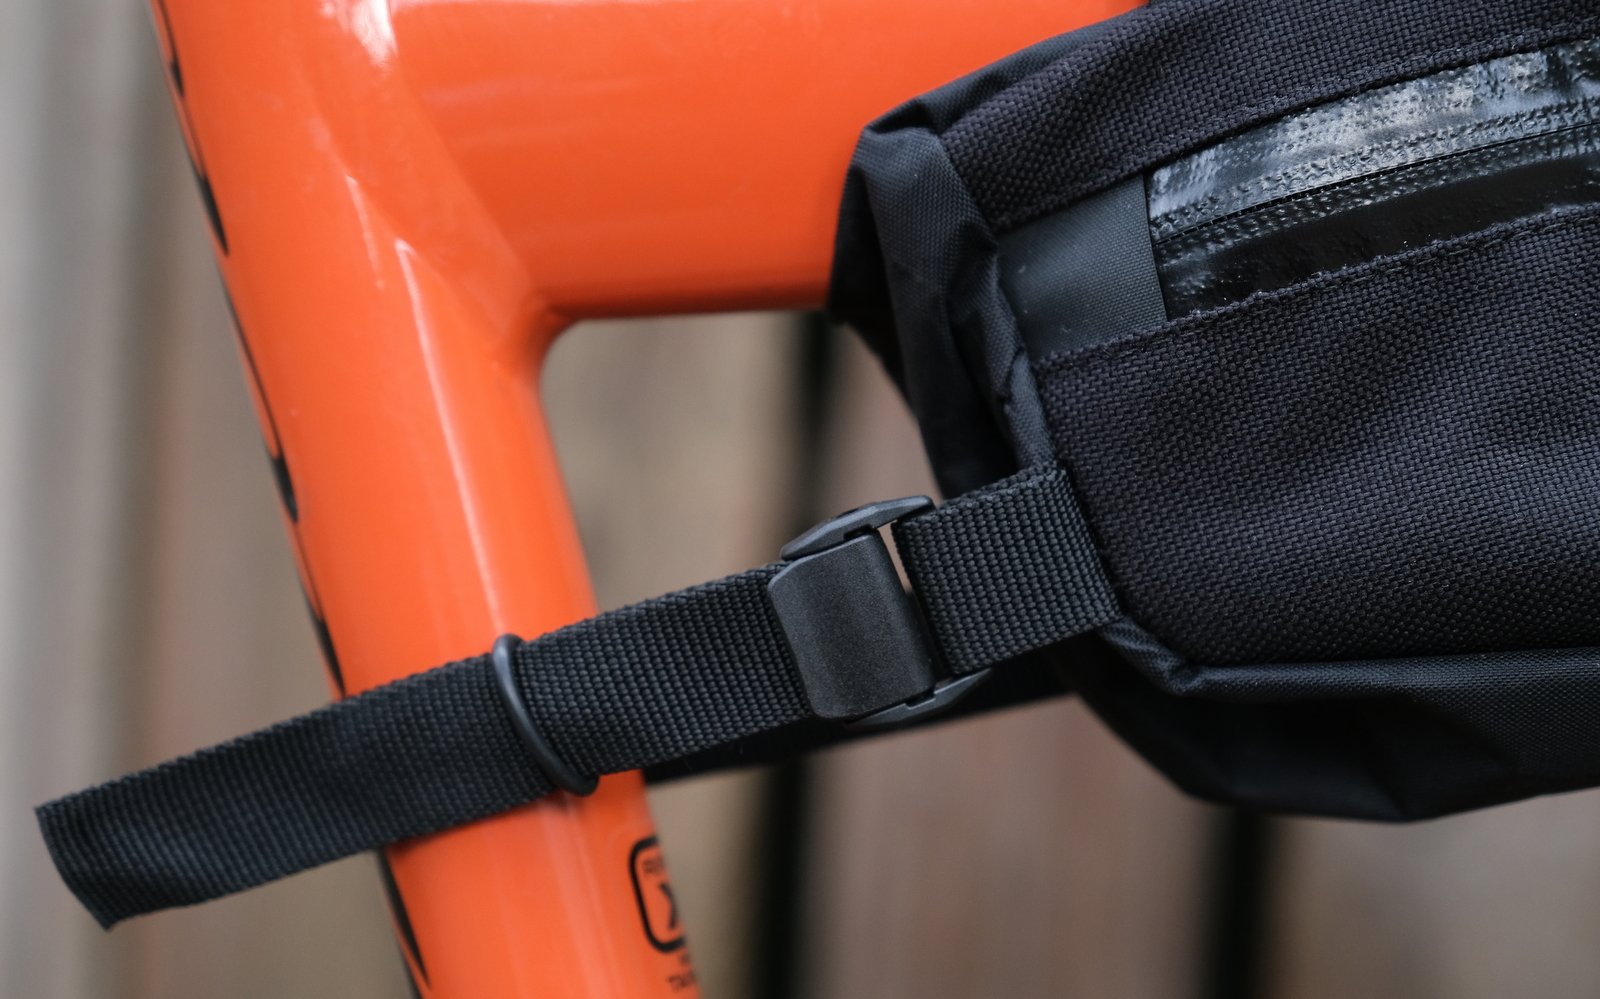
There are buckle style straps on the downtube and in the rear. They are very long, with lots of room for adjustment.
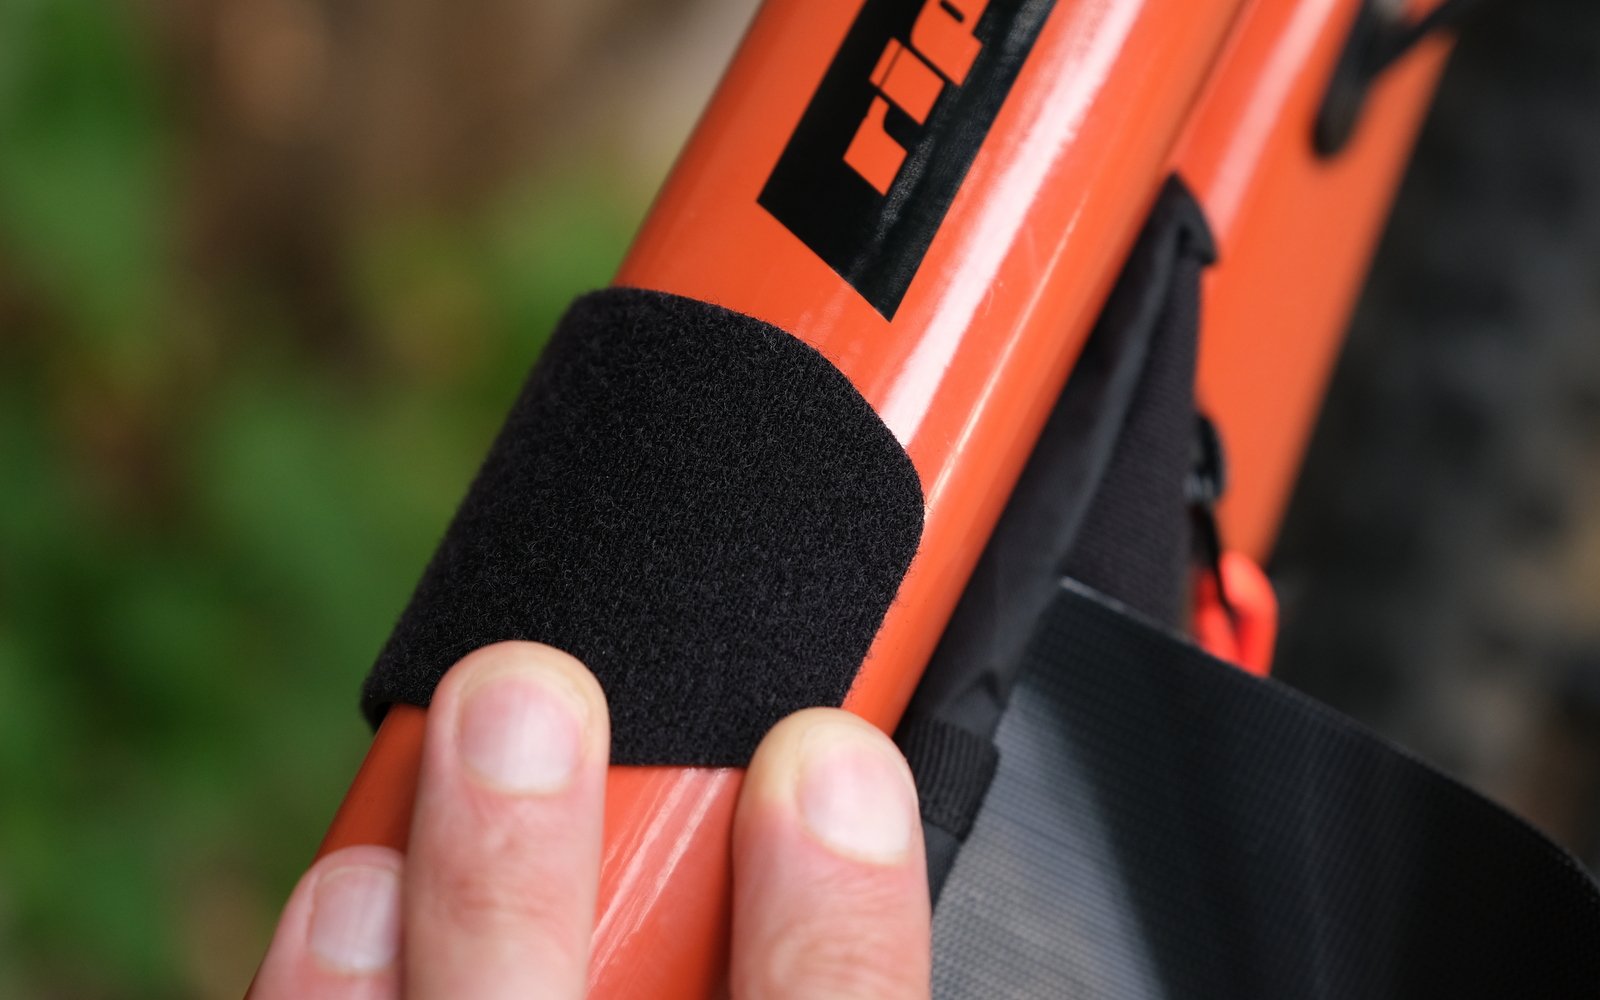
The two top tube straps are these fat velcro jobs. Simple, yet effective.
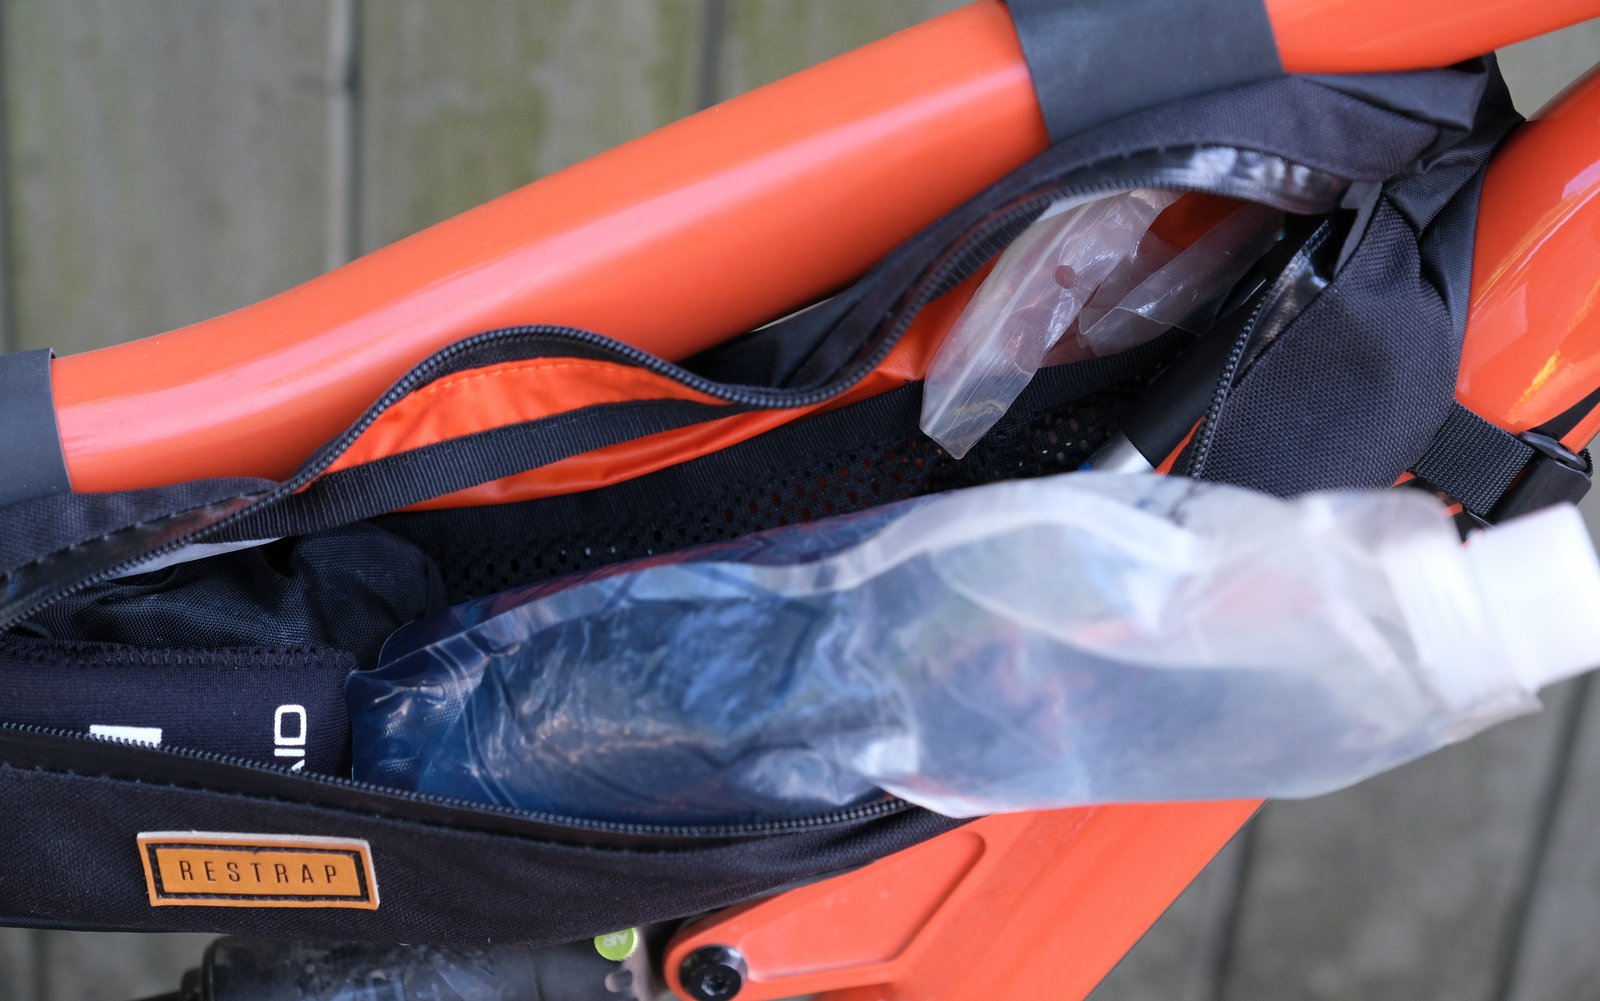
This bag has lots of room, plus some internal pockets, and another, separate zippered sleeve on the opposite side.
The Frame Bag
The Strategy – Stash all your heavy items low on the frame.
The Cheap Option: Make your own
My Option: The Restrap Medium Frame Bag. Sometimes.
Lots of bikepacking articles will talk about how important the frame bag is, and how critical it is to use it to stash all of your heavy items like stoves, tools and extra water. This poses a fairly large challenge for most of us mountain bikers. I can hardly get a water bottle onto most of the bikes I’ve ridden in the last year, let alone a frame bag. If you’re lucky, you may be able to squeeze something in to a corner of your bike, or have something custom made to take advantage of what little space you have. But most of us are just going to have to deal with not having a giant space to work with to fit a frame bag.
After digging around in Cam’s garage for an hour or two, I stumbled upon this Restrap frame bag and it just managed to squeeze onto the XL Ibis Ripmo AF. The kinked top tube gave it a few problems, and it gently kisses the top of the shock, as well. But for longer rides on the Ripmo, it’s perfect. I can easily stash all my tools, my first aid kit and a liter of water in there, with room to spare. If you can fit something like this on your bike, it’s a no brainer. The problem is that for many bikes, there will be very limited options that will fit. The Canyon Spectral 29 that I’m also riding laughs at the thought of using such a bag.
The Re-Strap Medium Frame Bag will cost you US$94.49.
Lessons Learned
Gosh. One more thing to worry about when shopping for a new bike, I guess. I can now see the value of a frame designed to allow for a bag within the front triangle. Until then, I can only dream, but I have a new appreciation for frames with vertically oriented shocks (certain bikes from Trek, Transition, Kona and others have increased level of appeals to me, all of a sudden) . You could probably send this guy $75 and get a custom made bag for your specific frame, though.
This is such a simple and effective concept. The 3 straps aren't quite enough to keep this in place, but with the extra strap around the seat mast, it is very secure.

I switched it up after this with some G3 (Voilé style) tension straps. The extra one on the top tube at the front probably isn't necessary, but I felt better with some extra security.
The Top Tube Bag
The Strategy – Stash commonly used items in a place close at hand. This would include food, tools, phone, and navigation equipment.
The Cheap Option: Any smallish bag or stuff sack and some Voilé style straps.
My Option: The Big Agnes Tiger Wall UL2 Bikepacking Tent
Like gravel bike specific lube, a bikepacking tent sounds like trend hopping gone too far. Amongst all this other crap, do you really need to fork out for a bikepacking specific tent? The answer is…maybe.
Big Agnes has a long history of making pretty solid backpacking tents. These will absolutely serve you fine for bikepacking, and other, camping needs. But Big Agnes thought that they could improve upon their existing tents with some subtle modifications. We’ll talk a bit about some of that in a later article, but here we’re going to focus on the killer feature that Big Agnes provides – their bikepacking ready compression sack.
Honestly, just look at that thing! It’s amazing. Not since the bread bowl was invented has somebody managed to turn the lowly package into something so functional. With a few straps and lash points, Big Agnes turned their tent into its own bikepacking bag! Genius (note…I spelled genius wrong in the first draft of this article).
Here, you can see how I managed to strap this in to the crook of my seat tube/top tube. It held in place fairly well just with the 3 straps on the bag, but I augmented this with a mix of G3 tension straps and cheap Velcro straps that I had on hand. On other bikes, you may be able to squeeze this into your front triangle, or strap it directly to your handlebar (or on the outside of your handlebar bag). Either way, it gives you options and it’s a great way to carry your tent without tying up space in your bike bags, or stuffing it into a backpack.
While riding, it was almost unnoticeable. It did require straightening every once in awhile, but that was mostly as a result of me sitting or leaning against it while I was stopped trying to figure out where the hell I was.
I did try it in a similar position on an Ibis Ripmo, but with the higher top tube it got in the way a bit while pedaling, and I don’t think I would choose to do it this way on a longer trip. There wasn’t enough room in the front triangle on that bike either, which became another point in favour for riding with the Canyon.
The tent is a fair investment, but if you factor in that the price includes a fairly robust bikepacking bag, it becomes a bit easier to swallow.
If you want to go the more traditional route, there are hundreds of options for top tube bags. I may add this little Brooks bag at some point and time, as it seems like a pretty good fit for what I need, and would see some use on longer, single day rides, as well.
The Big Agnes Tiger Wall UL2 Bikepacking Tent costs US $449.95.
Lessons Learned
Options are really great with all of your gear. A few straps on a stuff sack can be enough to give you loads of them. If you’re already shopping for a new piece of equipment, the one that gives you more options might be worth any extra cost. Of course, an enterprising individual could probably do some fancy things with any old stuff sack, some nylon webbing and a sewing machine.
As well, it seems like “bikepack” is a label you can slap on anything these days in order to charge a premium. The great thing is that regular folks seem to buy top tube bags, so there are some reasonably priced ones out there, all things considered. This could be one of the more inexpensive ways to move dense items off of your back or out of your seat bag. I will soon take my own advice.
Blackburn has sculpted this for clearance, but with the dropper this low, there isn't enough clearance to ride. I didn't ride anything too heinous with this bag in place, but it was seldom a bother while riding.

A close-up of the optional dropper bracket (optional to install, it is included) that keeps the bag away from your expensive dropper post. I think some extra reinforcement (or a single piece that wraps all the way around) between the panels at the front of the harness might help with load stability. Flex at this seam appears to be the cause of most load bounce, but it can be solved through careful packing.
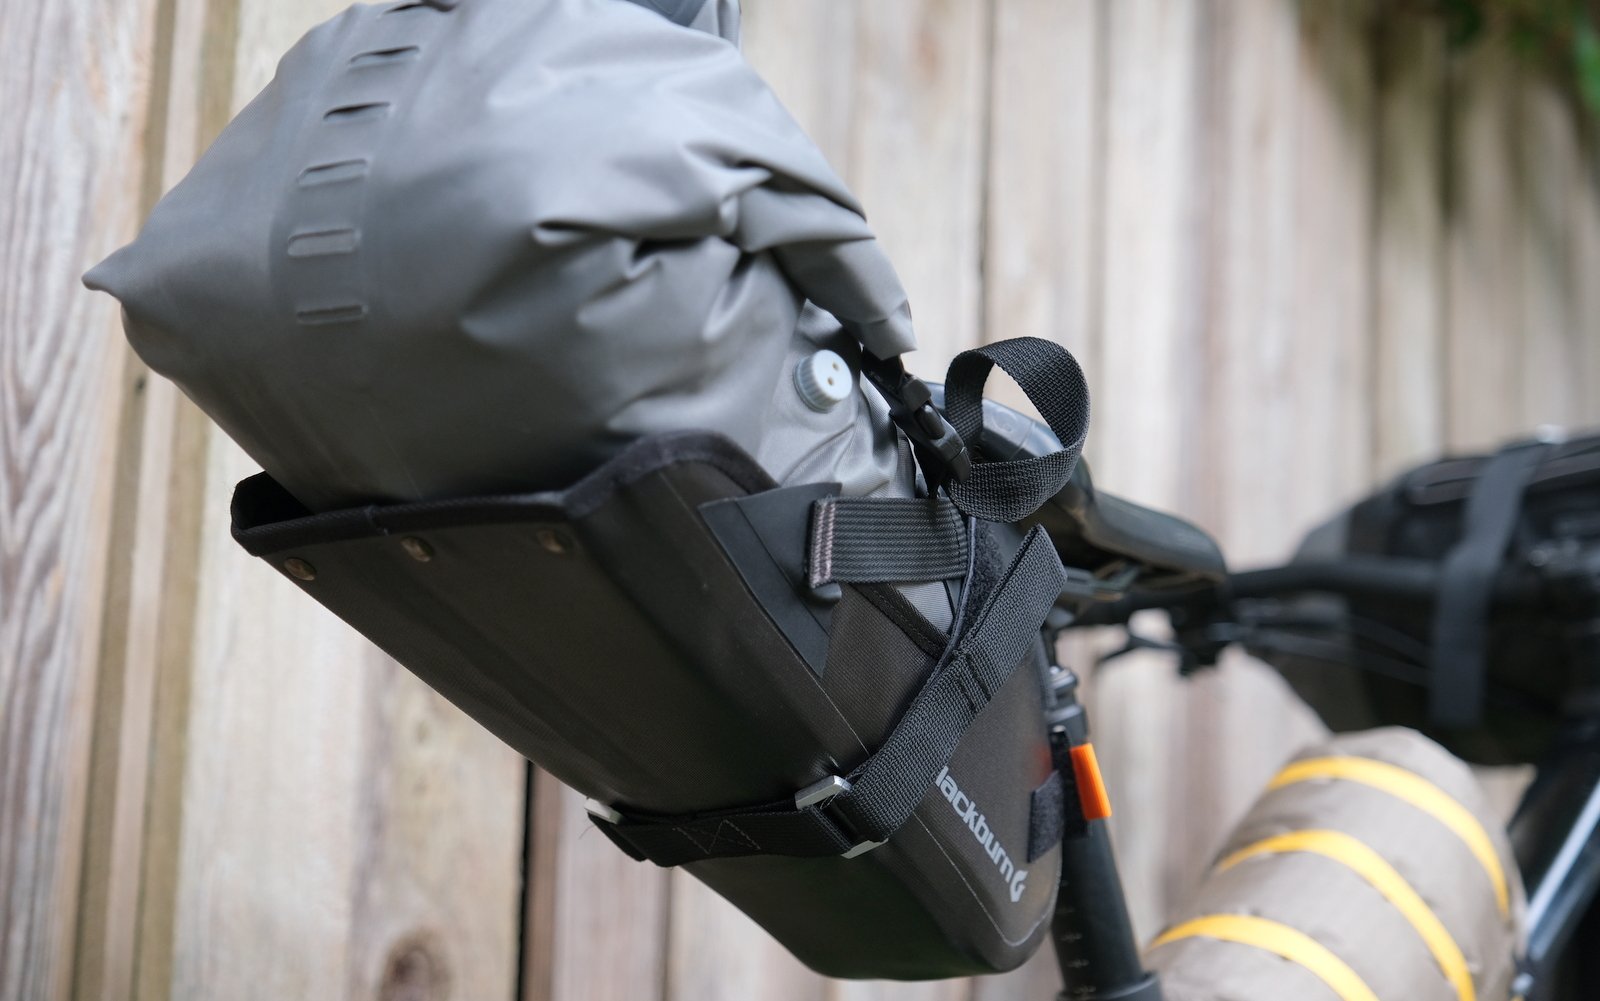
The dry bag is very well constructed and slides in and out of the harness quite easily. You do need to take care while packing as it will have an impact on your load stability.
The Seat Bag
The Strategy
Everybody seems to have their own strategy for the seat bag. It sits higher on your bike than a frame bag, so you don’t want to pack it too heavy (not to mention the weird stress it puts on your dropper), but it can handle denser items than on the front. It might not be a terrible idea to try to use this bag to balance out the load you are carrying up front, as much as you can. I ended up filling this with miscellaneous stuff. My sleeping pad, my electronics (headlight, spare batteries, chargers, etc), my toiletries, my flat repair stuff (patch kit, spare tube, tubeless patches) and my extra food. This strategy needs some work.
The Cheap Option: Strap another dry bag or stuff sack to your seat. If you choose this path, it could get really complicated, really quickly, especially with a dropper involved. People do it, though, but I could easily imagine screaming at my bicycle as everything exploded several hours from civilization. I think the true “cheap option” would be to go without, or to buy some of the much smaller options listed below.
My Option: The Blackburn Outpost Elite Universal Seat Pack and Dry Bag
There are a tonne of seat bag options out there, but if you’re running a dropper it can be a bit tricky to find one that works. There are a few companies making true dropper compatible posts (Rockgeist has a nice looking one), but there are also products available that may let you adapt regular seat bags to your dropper (Topeak makes one, as does Wolf Tooth). I decided to start with the Blackburn Outpost Elite, which has the ability to run both on a dropper post, and as a more traditional bag strapped directly to your post.
The concept is similar to what we saw with their front bag. There’s a harness that bolts to your bike, and a dry bag that slides into the harness.
The 7L dry bag has all of the same features as the one on the front. The same material, the same valve, the same hunk of Velcro to hold it in place while you tighten things down, and even some of the same lash points. The difference is that it has only one entry point, and that the bag itself is shaped like you’re about to frost a cake. This was strategic on the part of Blackburn, in the hopes of minimizing the interference that comes from the interaction of a dropper post, a full suspension bike and a seat bag.
The harness is a bit more complicated than the one up front, especially if you’re using the dropper mount option. There’s a bracket that gets clamped to your seat, and the bag gets sandwiched between the two pieces of this bracket. It’s a bit more finicky than the front one to set up as there are more pieces to line up, but simple enough once you figure it out.
Packing and mounting your dry bag can be a bit of an art form. The rear dry bag becomes a structural element and if you don’t pack it correctly, you may wind up with a lot of movement. It’s really important to pack the pointy end of the dry bag really, really tightly, and it helps to keep heavier items closer to the front. If done right, it’s fairly solid and more-or-less unnoticeable while you ride. If done incorrectly, you’ll receive lots of little love taps on your butt and tire buzz as you ride through bumpy terrain.
The other key thing with this (and any) seat bag on a dropper post is to check your clearance. You will very likely not be able to make use of your full dropper range. Figure out your bikes travel and try to create at least that much clearance between your bag and your rear wheel. I wrapped some gorilla tape around my post in an attempt to create an automatic stopper and this worked okay for about 30km. I don’t think the dust seal on my dropper was too happy about this technique. There’s a pretty good argument for getting a seat bag with a low profile strap system and using the Wolf Tooth Valais as both a strap keeper and a stopper. We’ll see if I can arrange to test that theory out at a later date.
One other thing I would wish for with this bag (and the front one, as well) would be the ability to quickly remove the harness from the bike. In both cases, you’re left with fairly large items that flap around in the breeze during transport (or if you’re riding sans bags from a basecamp). It would be nice if there was a quick option to get the largest parts off of the bike when not in use, or even just to strap them down tightly so they’re a bit out of the way.
After dialing in my dropper travel and packing the bag correctly, riding with this bag was seamless. I was surprised that I didn’t notice it while riding, and it really only made itself known while getting on and off the bike. The lack of full dropper movement was as much a limitation as anything.
This bag will run you US$180.
Lessons Learned
These things are complicated! It’s hard enough to set things up properly with an actual bag designed for this, that I can’t imagine what might happen if you try to wing it. There’s lots of advice out there to not pack commonly used items into your seat bag, as you should just leave it alone once you get it right. This is good advice. Every time I needed to pull something out of this bag, it felt like it required an extra 10-15 minutes to get it all packed up tightly again.
The limitations created by a large seat bag mean that it would probably be one of the last bags that I would invest in. Get as much stuff onto your bike by any means possible, put the rest in a backpack, and if you decide that you’re in this for the long haul, spend whatever it takes to get it right for your particular set-up. Dollars per storage liter tend to be high on this one.
Alternatively, start by spending 30-40 bucks on a 1.5-2L seat bag (here, here, here) and bask in the simplicity, clearance and cost savings. You will lose some of that bikepack je ne sais quois though, and you may need to buy some grips to match.
In Conclusion
There’s a point where this transitions from something neat to do, to something that consumes your life in a spiraling descent of consumer activity. There are infinite ways to strap things to your bike, and the best way to determine where you should spend your money is by doing it. What works for one person and one bike might not work for you. Save your money until you figure out what you need and what you want. Any other way will fill you with madness and regret.
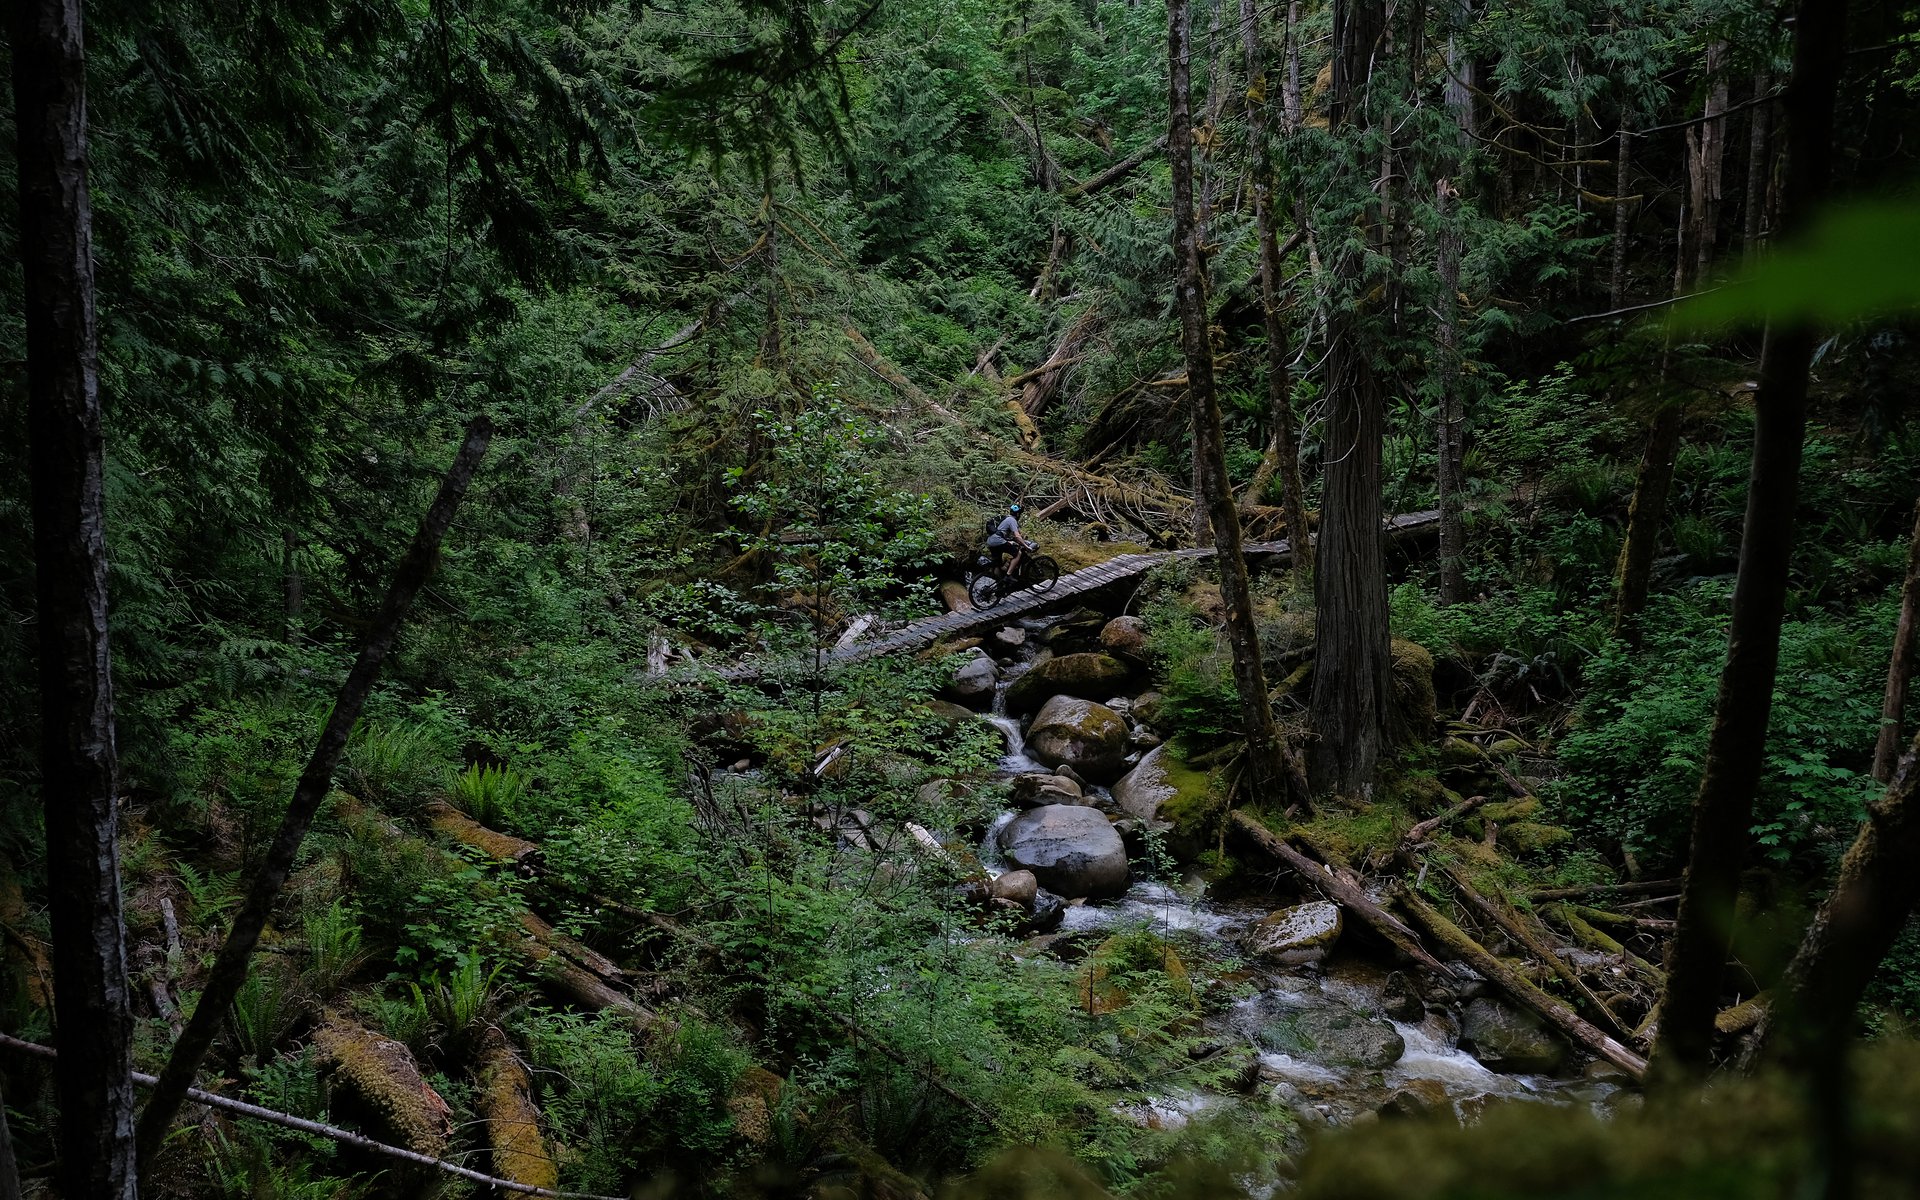
As Part 1 said, start really small and do an over-night trip with just a backpack and some stuff strapped to your handlebar. Even just that first little trip will teach you a lot about what you can leave at home next time and what particular things pain your soul enough to justify a large investment. One lesson that I keep re-learning is that the lightest gear is the stuff that you leave at home. You also don’t need to find room for it in your bag. If you don’t absolutely need it (ignore this advice for things that might save your life or prevent a 50km hike out), don’t bring it. For example, if you can replenish your food stash at the halfway point of your trip, then don’t start with a full trips worth of food! If it’s not going to be cold out, don’t bring a 30 degree sleeping bag! If you don’t need story quality photos, think about relying on your camera phone! I managed to do all 3 of these things on my very first ride, and I was too consumed with actually completing the days ride to eat all of my first days rations, or to take the time for more than a handful of photos (which is why I’m re-using the main image from Part 1 for this article, as well). Since then I’ve gotten smarter with the food that I pack, and I’ve left the camera at home.
So, this is the best guidance that I can give you right now on how to haul things on your bicycle. Up next we’ll deal a bit with some of the things that you may wind up hauling. Don’t worry. That’s not coming for a little while.


Comments
Vik Banerjee
2 years, 8 months ago
When I have used a FS bike for touring I went with a really stripped down gear setup and just used a conventional seatbag like we used in the 90's, but on the larger size. I stuffed it with compact food like energy bars that I didn't need right away. If you only have a FS bike I would definitely just try and make it work, but it is a challenge with the rear end space constraints and the smaller front triangle where some room is taken by the shock.
My main bikepacking bike is a hardtail to which I've attached a rear rack. I can then strap a dry bag to the top in place of a seatbag and use my dropper like normal. I could also attach other dry bags to the sides should I want to carry more, but I try not to pack excessively as it takes the fun down a few notches. With careful selection you can get a hardtail that tours well and the rest of the time is a super fun trail bike/wet weather bike/back up bike/etc...
Reply
Dave Tolnai
2 years, 8 months ago
Appreciate the real world experience with the smaller seat bag. The Blackburn bag works quite well once you have it figured out. I just wonder if it's worth all of the dropper clearance issues and care. I just lent the rear bag to somebody who used it on the weekend (I'll leave it to him if he really wants to chime in) and it sounds like it worked fairly well with a lighter clothing load. I think less weight and the ability to really pack into all of the nooks and crannies will really help things out, but you're still left with clearance issues.
Or just blow it all up and ride a hardtail. Does the rack system ever intrude while you are riding?
Reply
Todd Hellinga
2 years, 8 months ago
was on that trip and also had just clothes in my 6L topeak seatbag, with a DP mount to keep the strap off the post, although in a compression bag to keep things small. Tried to not max it out so that I could keep it as compact and taught as possible, pretty satisfied with how it worked, although the occasional buzzing of the tire and keeping the post up a bit more than desired wasn't perfect it certainly wasn't terrible.
2 guys did minimal bags on bikes and just packs, and I had 22L daypack and 3 things on bike, would probably try and get a 30L pack next time and try and reduce weight on bike. Definitely something you need to just experience and figure out what works best for the type of riding/days you're going to be doing.
Reply
taprider
2 years, 7 months ago
Not much action in the comments section this week.
Where is the usual Uncle Dave controversy?
maybe next week might be Ear Buds vs Ear Worms for bikepacking
Reply
Please log in to leave a comment.