
Cutting an Avid Brake Line
We at NSMB.com have to start this article with a disclaimer: the suggestions made below are just that. Brakes are critical to your survival. If you are not proficient at bleeding do not attempt the procedures listed below; in fact, even if you are, don’t do this. It’s lazy. Bleed your brakes properly, you lazy ass. If you don’t know how to do that, take your bike to a shop. Now, if you’d like to learn about a time-saving ninja manoeuvre that works in a pinch, read on.
Part 1 – Install and Hose Cut
Step 1 – Get prepared
When your hands are all covered in DOT fluid, it’s not a good time to be running through the house looking for the right tool. Get all of your tools ready. Set your work area up! I always, always half-ass this with other jobs, but I make a point of being prepared if I’m cracking into a brake line. This includes:
- T25 Torx wrench
- 5mm Allen key
- 8 & 11mm open end wrenches
- Cutting apparatus – guillotine style cutter preferred but a GOOD set of cable cutters will work
- Gloves. Don’t bareback this job. You need protection
- Water receptacle
- Zip ties
- New barb and compression fitting

The tools.
Step 2 – Take some photos
I’ve never actually done this myself. But think about it. How many times have you gotten halfway through a job and thought “Left side? Right side?” Now imagine you had a few photos?
Step 3 – Take off the old brakes
If you need instructions on this, take your bike to a shop, please.
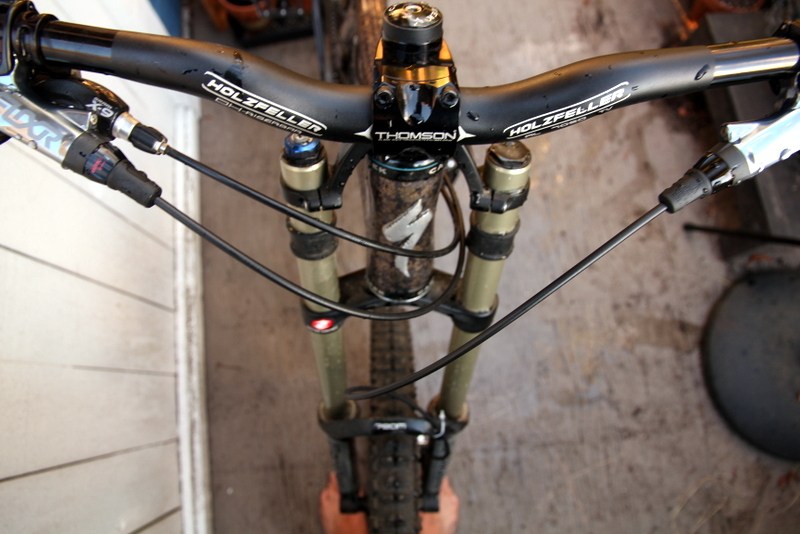
Step 4 – Put on the new brakes
As above, I hope you don’t need help with this. A few points to think about:
- Work from caliper to lever. Start with the caliper then bolt on the lever. Same with the brake line. Work from the back, zip tieing as you move forward. You want the rear of the bike to be perfect and a giant loop sticking out by the handlebars.
- Remember the proper star-shaped tightening pattern on your rotors.
- Why is this a torx bolt?

The torx head on the Elixir’s matchmaker clamp.
- Don’t forget to adjust the angle of your brake line coming out of your caliper. Push on the brake line while turning the nut in the same direction. There should be no need to tighten the nut once it has moved.

Hose angle out of the box.

Hose angle adjusted to suit the fork.
You should have your brakes installed at this point, looking great except for a bunch of extra brake line.
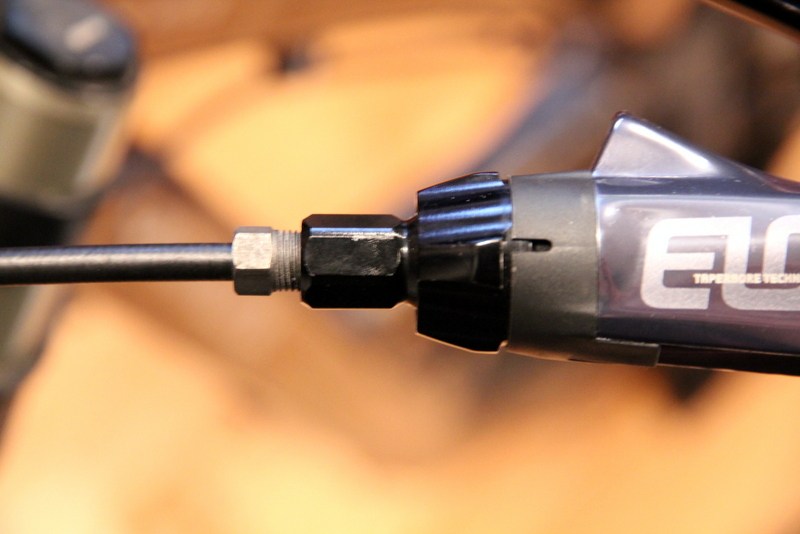
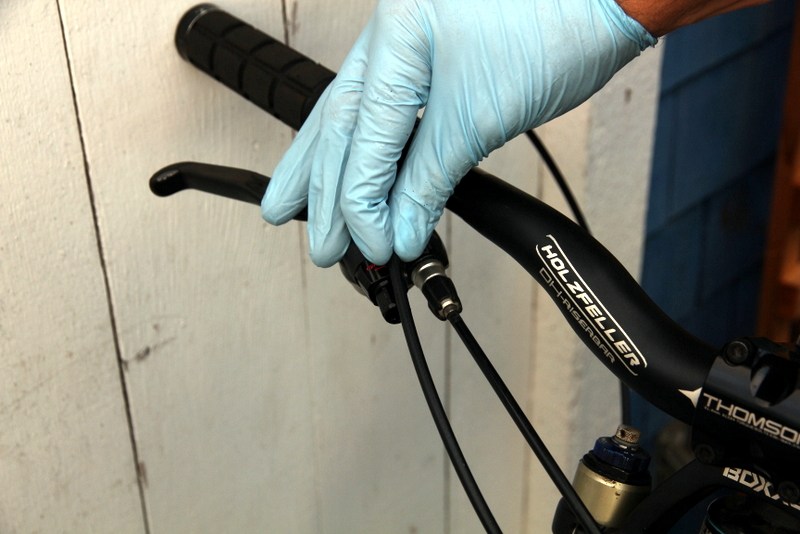
Step 5 – Remove the brake line from the lever
Pull the rubber boot back. Push it down the brake line

Rubber Booty.
Undo the brake line. You will need the 11mm to hold things in place while you undo the compression nut with your 8mm. Push the compression nut down the brake line.

Undo the hose.
Step 6 – Cut the brake line
Here is where it can all get screwed up. Measure twice, cut once, etc. A tiny bit of extra length is generally a lot better than not enough. If you’re setting up a new bike, set your derailleurs up first and get your housing length dialled in. Re-doing derailleur housing is a lot easier and cheaper than brake line. Use your rear derailleur housing as a guide for your rear brake line. The front line is a bit more of a judgement call.

Cut the hose to length, being careful of the little bit extra that goes into the lever itself.
Make sure you account for the length of brake line that disappears into the lever. Apparently the groove at the top of the “hex hose stop” marks the length that you should cut to.
Guillotine style cutters are better (I think, I’ve never actually used one) but a good set of cutters will work. The nice thing about Avid brakes is that the thread-in barbs aren’t too picky about how round you leave the end of the hose. Make sure your length is good and go for it. The small bit of DOT fluid in the cut piece of brake line will probably go exactly where you don’t want it to go at this point.

Moment of truth… cutting the hose.
Step 7 – Put it back together

Use your cutters or a pair of pliers to round out the cut end of the brake line as best as you can.

Thread in the barb.

Put the compression fitting in place.

Get your compression nut in place.

Don’t worry too much about how well things are lined up. As long as you push the end of the hose in as far as you can, the compression nut will put the compression fitting in the right place and everything will be fine.

Stick it in the hole. Thread the compression washer in by hand.

Tighten it up.

Put the rubber booty in place.

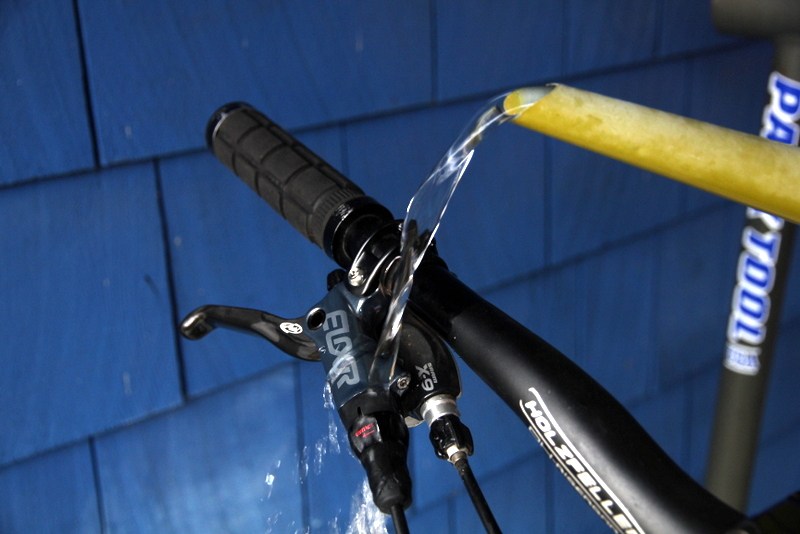
Hit it with some water to kill the DOT fluid.
Step 8
You should now have a bike with proper length brake hose.
Step 8 is debatable. If it’s my personal bike, Step 8 is go for a bike ride. Honestly, I’ve built so many bikes, not done any sort of bleed at this point and time, and been totally fine. It’s not always “perfect” but it generally gets the job done. True, your brakes could be full of air at this point and you’ll be riding down a hill and your brakes won’t work and you die. That hasn’t happened to me yet.
xIf you have a race tomorrow – bleed your brakes. If you know you got a bunch of air in the lever during the hose cut – bleed your brakes. If you can’t stand the slightest amount of brake pump – bleed your brakes. If you’re an anal rule follower – bleed your brakes. SRAM does not want you to not bleed your brakes. Personally, I think it’s a SRAM/DOT fluid industry conspiracy to keep the world DOT fluid market afloat. (Editor’s note: As mentioned above, NSMB.com policy is to always bleed lines after they have been cut. In this instance we are anal rule followers. Do it.)
Part 2 – Getting the air out
Okay. You’ve decided that you’re not a risk taker. You need to get some air out. Hold on there, Johnny. We can still save some effort. You don’t need to do a full bleed. Here’s my thinking:
- All the air is up there in the lever/master cylinder
- Your brakes are full of brand new DOT fluid
- Every time you open up your brakes, you’re increasing the chance that you introduce air
So, let’s simplify things. Let’s avoid filling multiple syringes. Let’s avoid opening up our brakes at multiple points. Let’s simply target getting the air out of our lever/master cylinder as quickly and efficiently as possible.
Step 1 – Get prepared
Once again, we’re going to have crap on our hands very soon. Let’s get all of our tools ready. This includes:
- Tiny little SRAM Torx wrench
- 2.5 mm Allen key (for brake pads)
- Bleed kit
- Bleed block/pad spacer
- Fresh DOT fluid
- Gloves
- Water receptacle
Step 2 – Get the brakes ready
Wheels off. Pads out. Brake pistons pushed in. Bleed block in. Contact adjuster all the way in, bleed port facing up. Levers moved so that the bleed port is the high point of the system.
Pads out, spacer in.
If you don’t do all of this, especially if you leave your brake pistons out, you risk putting too much fluid into your brakes. Indeed, if you can’t push your pistons all the way in, this may already have happened. If so, take the bleed screw out of your master cylinder and then push your cylinders in. Some fluid will puke out of your master cylinder and your brake pistons will go all the way in.
Step 3 – Get your syringe ready
Fill a syringe 1/3 to 1/2 full.
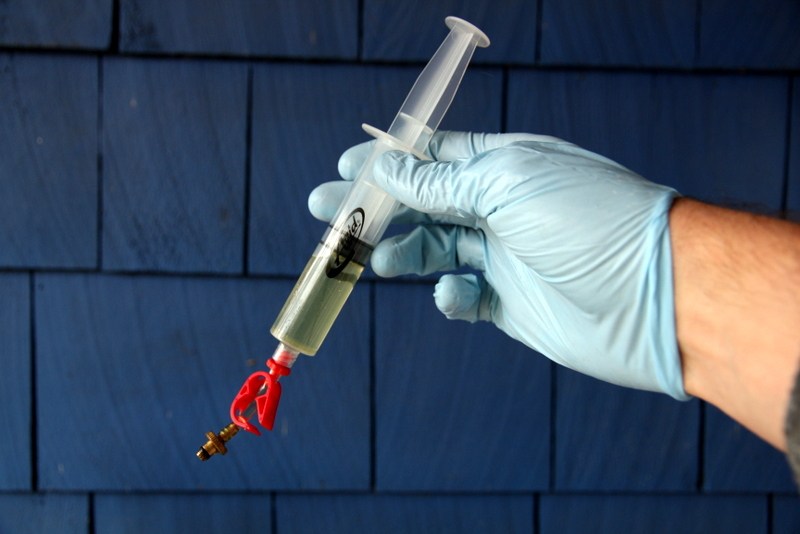
At this point, with a full bleed, you have to get all worried about syringe preparation. However, since we’re not really introducing much fluid into the system, we don’t have to worry too much about it. Feel free to do the SRAM pull-the-air-bubbles-out-of-the-fluid trick if you want.
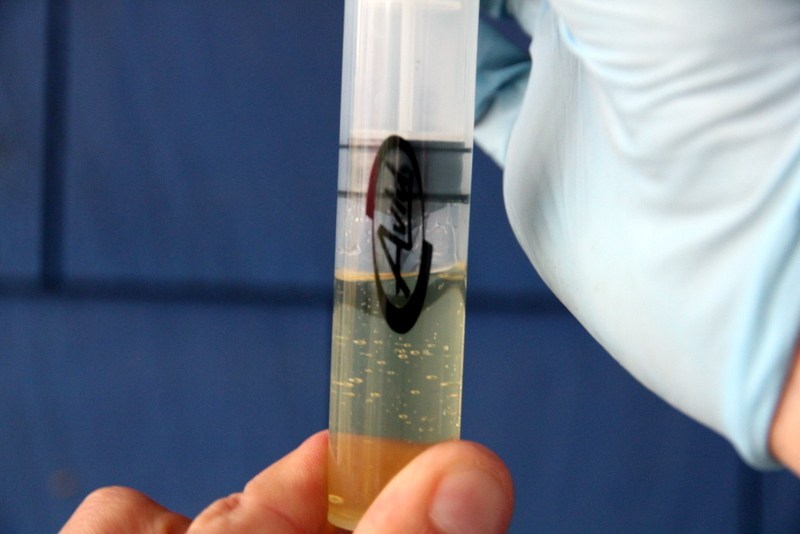
A bit of air at the top of your syringe (between the plunger and the fluid) is okay at this point – we’re only going to introduce more air in here anyhow – but it’s best if the tube portion of your syringe is full of fluid at this point.

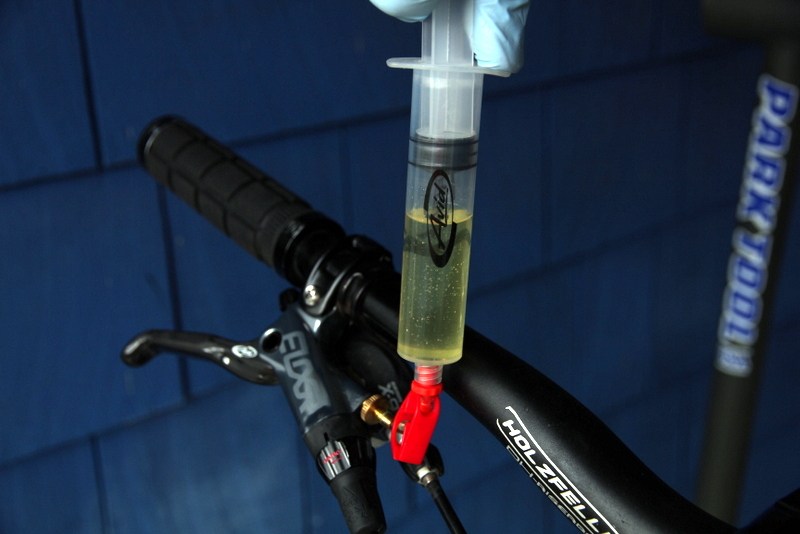
Step 4 – Bleed the brake
Take the bleed screw out of the port on your master cylinder. Thread your syringe in. Make sure it is tight.
Now, think about what we’re trying to do. We’re trying to suck air out of the master cylinder/lever/top portion of the hose. We do this by pulling a vacuum with our syringe. As long as the bottom of your syringe is full of fluid and your syringe is threaded in tight, it’s very difficult to screw things up at this point. The full SRAM bleed increases your chances of screwing things up because a lot more fluid is transferred. With this technique, at most we pull a few bubbles out and replace them with fluid.
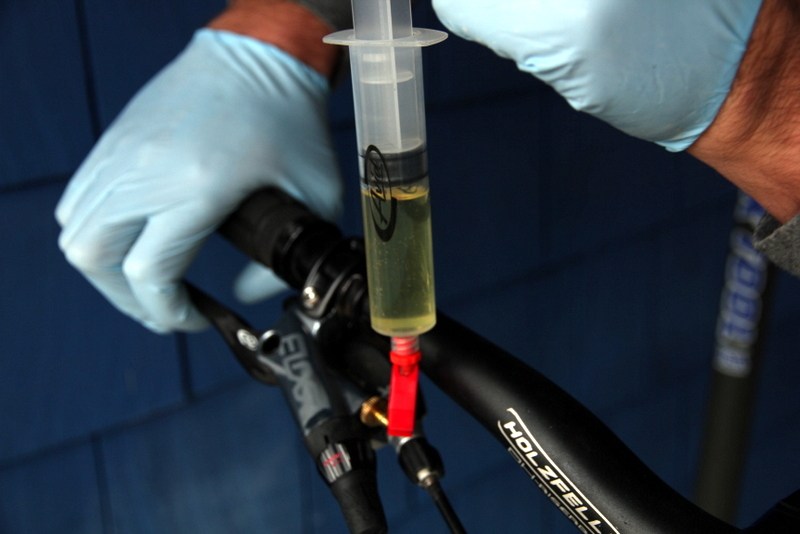
Pull gently on your syringe. If there is any air, it will probably come out right away. Pull a vacuum and watch for bubbles.
It’s very difficult to introduce air as long as everything is tight and you keep the syringe upright. Work the lever a bit. Turn the contact adjust a few degrees. Whack on things with a wrench. Hold the vacuum for 10 seconds or so. Keep working things until air bubbles are long in your past.
Unscrew the syringe. Screw in the bleed port screw. Hit it with some water. You’re done.
Part 3 – Full Bleed
That didn’t work? Okay. Go here or here.
The top end bleed seems like a good idea if your older Elixirs go flat. What do you think of Dave’s “Lazy Mechanic” approach? Ever done it? Or is this just way too much risk for your stoppers?


Comments
FullMonty
11 years, 3 months ago
1. go to buynsell
2. sell avid brakes
3. buy shimano brakes
4. ?????
5. you have brakes.
Reply
boot
11 years, 3 months ago
Sweet tutorial, but for best results… toss them in the garbage can!
Reply
Bryce
11 years, 3 months ago
those torx heads annoy me too. not needed for a bar clamp.
Reply
walleater
11 years, 3 months ago
Yeah, not much point bleeding the caliper when you are working with the lever. I've done the above method countless times with no issues and no bleed. Just keep the hose pointed up / don't swing it around your head etc….When you screw the barb in it effectively forces out any remaining air in the end of the line. If you want to be anal you can remove the pads, squeeze the lever to get the pistons to protrude a bit, do the cutting etc, join everything up, fully retract the pistons, thus forcing any air from the connection into the lever itself, then bleed the lever.
Whatever you do, when finished, always put the bike on it's back wheel with the leaverz pointing up, and repeatedly squeeze the levers to see if they go back to the baaaa. This will help to avoid any painful tree / mouth interfaces….
Reply
Dirk
11 years, 3 months ago
I'm going to get in front of this one a bit. Reading the Editors comment about doing a full bleed. My experience, and what lead me to change things up as described here, is that when I would follow the full SRAM procedure, my brakes would work worse than when I started.
When you look at the SRAM procedure, it is essentially broken down into three bleeds - Caliper, Hose, Lever/Master Cylinder. This procedure just kind of takes away the Caliper/Hose portions and focuses on the Lever/Master Cylinder. By not messing around at the caliper, there is no chance that you will introduce air at this point. You stand a better chance of not screwing up your bleed.
Reply
Please log in to leave a comment.