
Project Bike: Part Two
At this time last year, the economy looked worse than it does now and we hatched a plan to take an older frame and spice it up with new parts. It was an alternative for riders who couldn’t drop a ton of cash on a new ride last season. The idea was that even if you were not going to clean house stem to stern on your old steed, a couple of upgrades might really put the spark back in your bike and we all know that leads to something good… more riding.
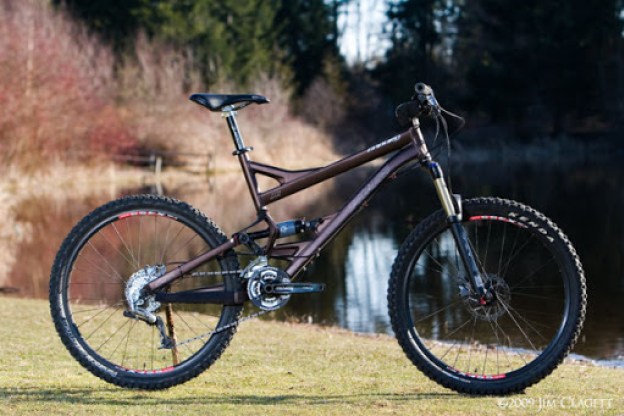
The unwitting Enduro before it was stripped bare and rebuilt like the Six-Million Dollar Man. || photo: Jim Clagett
So we grabbed and older Specialized Enduro frame and got to work. We chronicled the starting point in the first installment (you can find it here) and then rebuilt it from the ground up. New drivetrain, brakes, suspension, wheels, tires, headset, bottom bracket, bars, seat and even a shiny pair of pimpin’ NSMB bar end caps all joined forces to create to whole new ride. So after almost a full year on the trail, how did we do? We’ve certainly got winners, no real losers and an “incomplete” to tell you about. In this segment we’ll cover the SLX kit from Shimano (crankset, brake set, shifters and rear derailleur).and the new sneakers from Schawlbe. The later this month will wrap it up with a section dedicated to the wheels, suspension and overall impressions.
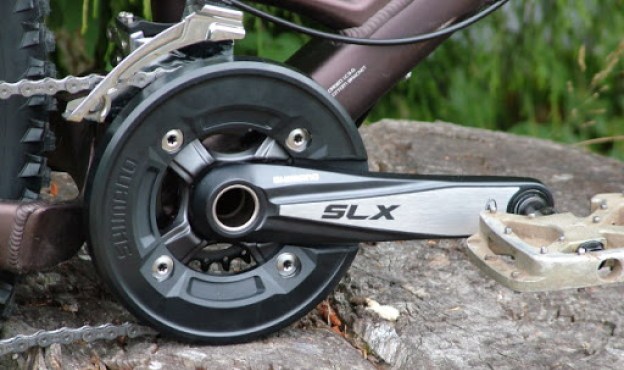
Shimano SLX Crankset
A lot has been written about Shimano’s new group in the last year. Most of it very complimentary and my impressions of the gear didn’t offer me any reason to disagree with those assessments. It is easy to install, sturdy, relatively light, handsome and does what is supposed to without complaining. In short, there is not a lot to dislike; period. The crankset Shimano sent me is interesting as it was designed from the ground up as two ring (with a bashguard) system. Most of us have been running mountain cranks that were designed as a three ring system and just removing the outer ring and replacing it with a bashguard. While this is effective it limits the overall gear range of the bike unless you get larger ring for the middle slot. Shimano realized this and spec’ed larger than normal middle ring (36 tooth) included with the crank. This combined with the shorter than normal (for me) 170mm crank arms added up to a whole new way of shifting and riding.
The crank pretty much sums up the SLX group in a nutshell: smart looks and solid performance.
I spent a lot more time in the smaller ring than I am used to and it didn’t turn out to be a bad thing. The frame’s suspension is fully active when pedaling in the small ring and it made grinding around in the bumpy uphill sections of the trail pretty nice. When I shifted up to the middle ring and really pushed the bike the acceleration was noticeable. A bigger chainring plus shorter crank arms equals much more speed at the same cadence. The additional root clearance offered up by the shorter arms was terrific when combined with adding an inch to the front of the bike (longer travel fork). The combination makes it possible to keep applying power through even the roughest sections without slamming your pedals.
The quality of the cranks is very high and the polished silver face on the outer crank arm is a nice little trickle-down visual cue from the much more expensive XTR line. The included honeycomb polycarbonate bashguard is understated, solid and functional; very Shimano. If anything the stealthy black finish just serves to highlight the signature silver stripe down the crank arm. Some rugged impacts have done little (if any) damage to the guard and it certainly seems plenty tough enough for its intended purpose.
The cranks use Shimano’s Hollowtech II construction and tip the scale at just under the 1000 gram mark with the included BB. You could do a lot worse for a lot more money than this setup. Value-wise (MSRP $239 USD for the cranks and bottom bracket) it is a as close to no-brainer as you can get in mountain biking.
SLX Shifters and Rear Derailleur
The SLX shifters are probably the weakest link in the group. That is not to say they don’t do their job or work just fine, it is simply to say that they lack some of the polish of the other parts in this outstanding group. Not measuring up to such a high bar is not a sin, just somewhat noticeable when everything else is eye-poppingly good. Having spent a fair amount of time on their counterparts from the group right above them (Shimano XT) I can say the SLX’s are similar but not quite the same. Their shift paddles are not quite as smooth on your thumb as the XT’s, their action a bit heavier, etc. Basically all of the things you would expect from the next step down in the line. That being said they do have some nice features like the removable optical gear display. Choice is nice and Shimano has not always honored that, so them letting you have it your way on the options is positive.
Do they shift? Yup, every time. They have the same push/pull triggers that are on the XT and XTR lines and feature a bit of float before they engage. This leads to a short adjustment period if your are transitioning from using their competitor’s product but once they are properly adjusted they deliver reliable and consistent performance. The only issue I had over the course of the test was the barrel adjuster on the rear shift. It became really tough to turn after a few months. It still does its job it just complains a bit wile doing it. Considering how much you use barrel adjusters once your cables have stretched that is a pretty small concern.
Why pay more when it is all here? Good question and a tough answer that Shimano will have to come up with.
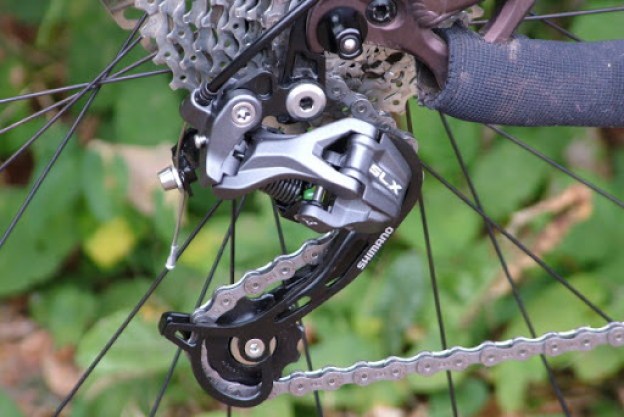
The SLX rear derailleur is a thing of beauty. It has clearly benefited from all of the R&D done on its big brothers, XT and XTR. Many of the nicer features found on those much more expensive parts are seen here as well. The wide “X” shaped body of the derailleur provides a stiff platform that translates in to quick and accurate shifts. The stronger spring and straight pull cable design help out in that department as well. My favorite feature is the low profile “Shadow” design that has the derailleur hanging in a straight line below the hanger, rather than sticking out the side of it. This effectively tucks the part away in safer position and protects it from potential trail hazards. If you have ever yanked a rear changer off on a stick or a rock mid-ride, this feature is easy to appreciate.
This part in particular makes me wonder why anyone would shell out the extra cash for a comparable XT (or XTR). Almost all of the benefits are here with very few compromises and cost differential is significant. With performance like this out of its lowest serious mountain group, it leads me to wonder how Shimano will make XT stand out from its fancy new younger sibling (SLX). That remains a challenge for the engineers and marketers, but in the meantime you can reap the benefits right now… for very little money.
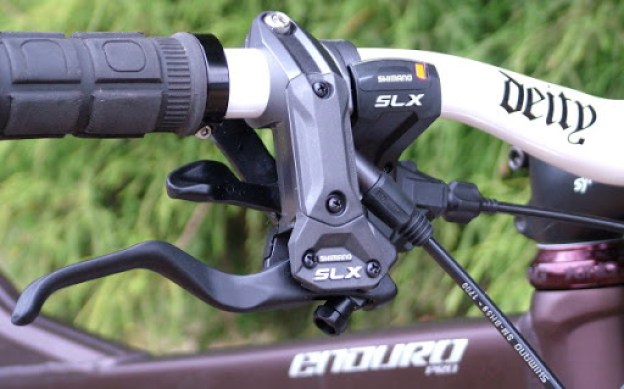
SLX Brakes and Levers
Knowing you can stop is a big part of going fast. The more confidence you have in your brakes the easier it is to let it all hang out on the trail. Like a lot of the rest of the SLX line the look and feel of the brakes and lever is similar to higher priced Shimano offerings. They have a nicely shaped lever and an easy reach adjustment knob built in to the base of the lever/reservoir combination. It offers a great amount of lever travel that allows the brakes to be adjusted properly for just about any sized hand. The modulation is on par with the XT’s and that is a very good thing. Shimano’s Servo Wave technology (used on both the SLX and XT lines) offer great feel that lets you know exactly what your wheels are doing in a variety of conditions. The amount of power they produce is where you can really feel a difference between the SLX and XT brakes.
Nice ergonomics and solid design all around. The angled cable exit is just another well thought-out small touch that makes things just that much easier to build up easily.
The SLX brakes offer good power for cross country and some all-mountain riding. However when the going got steeper and rougher I sometimes found myself wishing for more power. One possible culprit is the stock resin pads. Although they are holding up well, when it does come time to replace them I will look for a pad made of a different compound and see if it ups the bite offered by these binders. My only other complaint is that the brakes do not feature a split clamp mount. That means to take them off the bike you have to remove the grips rather than just pulling off the upper part the clamp and removing only the brake from the handlebar. It is a small thing but if you work on your own bikes it is certainly handy to have the ease of split clamp mounting.
The front brake has a clean look mated with the Shimano rotor. This is the 6-Bolt version but it does of course come in Shimano’s own Center-Lock standard as well.
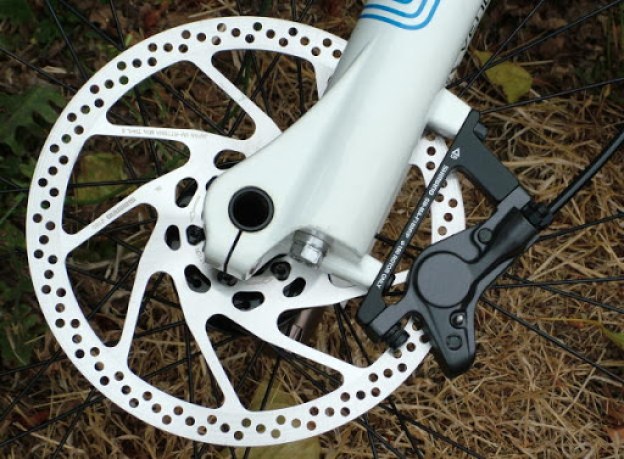
Overall the brakes performed quite well. They mounted to the frame cleanly and easily, were easy to center on the rotor (and stayed there), made very little noise and have just as much power as they day they came out the box. I have not had to bleed them yet either. If you do need service them you will need mineral oil, as all Shimano brakes run it in their lines rather than brake fluid.
Schwalbe Fat Albert Tires
When putting together the spec on this project I wanted tires that were big enough and tough enough to handle rougher conditions but did not weigh a ton. Nothing will make a bike feel like a tank faster than really heavy tires. On the other hand, nothing takes the fun out of riding rough, technical trails faster than having to stop and change a flat every half and hour. Enter the Fat Albert tires from Schwalbe. The original Alberts were first designed over ten years ago as a higher volume tire that could handle all kinds of conditions in the Alps, but the new Fat Alberts have been completely redesigned to take advantage of newer tire technology. They have front and rear specific tread patterns and come in either 2.25 or 2.4 widths, and in tubed or tubeless versions. The new Fat Alberts also offer a choice of several options integrated in to the tire.
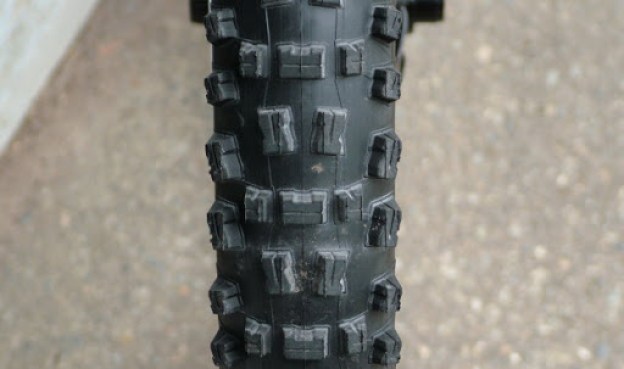
The front tire’s vertically oriented center knobs and side knobs are both siped to add steering grip.
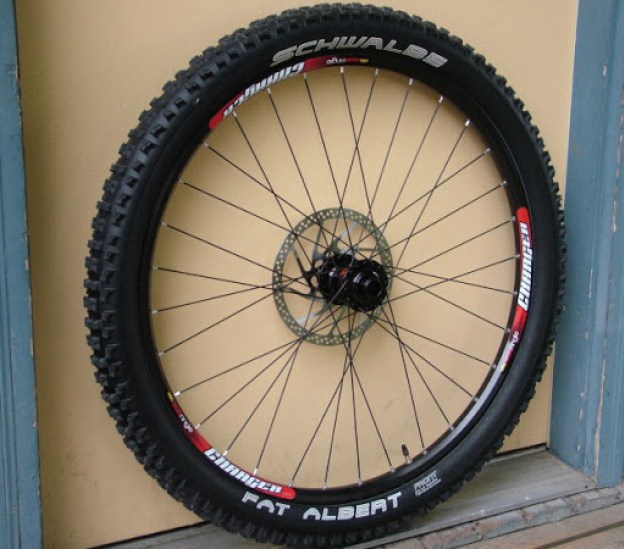
My set (2.4 front, 2.25 rear) came with the “Snakeskin” feature which is actually a fabric layer integrated in to the sidewalls to aid puncture resistance. You can see the cross-hatched diamond pattern of the Snakeskin layer on the sidewall and it gives the tire a really unique look. The tires also boast Schwalbe’s “Triple Nano” rubber compound which combines three different types of rubber in different areas of the tire to maximize performance. The actual width measurements of the tire mounted on the rim come out a bit wider than advertised, which is fine by me. Even after packing all that good stuff in the front weighs just over 750 grams and the rear comes in at a wheel-turning 650 grams… but how did they perform?
The tires have turned out to be a pleasant surprise after a little fiddling. The sidewalls state that you should use a minimum of 30 PSI. That seemed a little high but I figured I would give them the benefit of the doubt. After a just a few rides they felt too stiff and I checked with my contact at Schwalbe and she assured me that I could run them with a lower pressure. I started working with different pressures and found the tires have a much wider performance envelope and more comfortable ride using pressures in the mid to lower 20’s. This allowed the tires to grip much better and to deflect off of rocks and other hard trail objects much less. The Snakeskin protection lived up to its billing even at these lower pressures and I have not had a flat while running these tires.
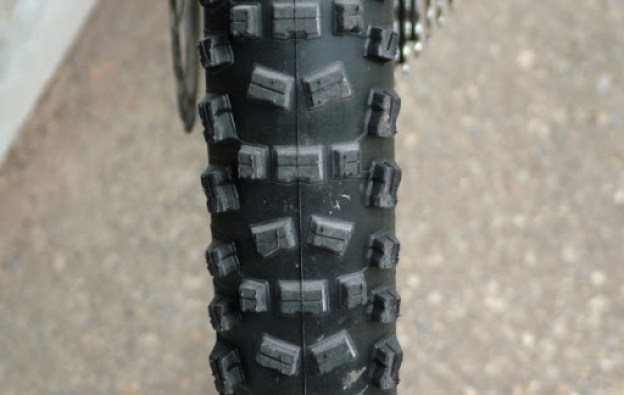
The tread pattern is aggressive and the corner knobs really like to bite in to the trail. This offers superior traction in soft, loamy or loose conditions and tires grip well at the trails start to dry out on those “medium” days as well. However when you encounter true hardpack or overly rocky trails the tread can get to be too much. The harder side knobs are still looking for things to dig in to and their stiffness can cause the tire to deflect a bit more than I really enjoy. Given that I live where the trails are loamy almost year round this was not really a big issue for me.
You can see just a hint of the “Snakesin pattern on the lower right portion of the sidewall. It ceratinly helps to make tough trail tire.
The tires were a perfect compliment to this build. Wide enough to inspire confidence in the rough stuff but light enough to pedal all day. Combine those qualities with great puncture resistance and excellent tread wear and the tires are a real “do-it-all” bargain. The MSRP varies from $79.95 to $82.95 (Schawlbe’s says U.S. and Candian price will be just about even) depending on your options. Given the long wear life, you’ll certainly get your money’s worth.
That’s all the goodies for part two of our Project Bike series. Later this month we’ll wrap the whole thing up, focusing on the Sunn Ringlé wheels, the X-Fusion suspension and overall impressions of the bike as whole.
Ed Snyder
Made any good upgrades to your own ride lately? Seen any parts you are flat out drooling for this season? Chime in with your two cents right here.


Comments
Please log in to leave a comment.